MailScanner Spam/Virus Filtering
Every hosting account at Maxer Host is protected by MailScanner. MailScanner is a sophisticated utility that scans all incoming email arriving on our email servers. MailScanner stops 'bad content' such as spam, viruses and malicious attachments from reaching your email inbox.
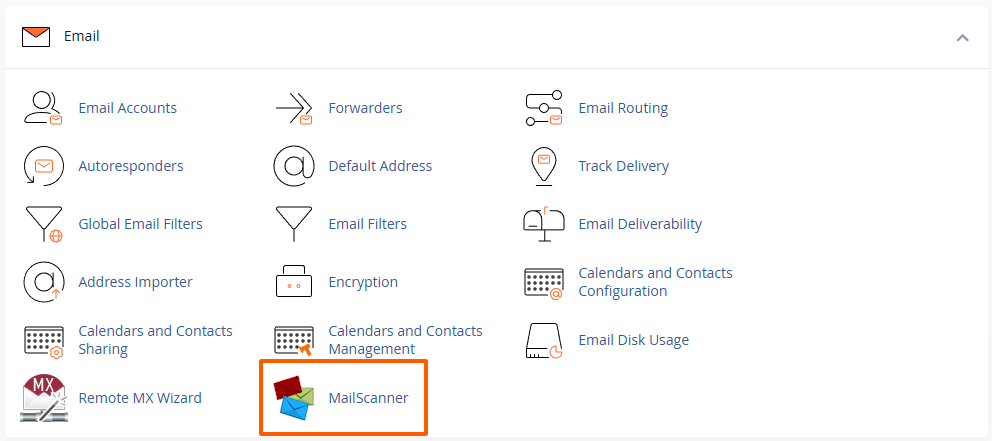
MailScanner allows you to manage email senders by adding them to a whitelist (approved senders) or a blacklist (blocked senders). Here’s how to manage these lists through MailScanner in cPanel:
-
Log in to cPanel
-
Access your cPanel by entering
https://example.com/cpanelin your web browser. -
Enter your cPanel username and password.
-
Detailed guide: Accessing your hosting control panel (cPanel)
-
-
To add an email address or domain to the whitelist:
-
Enter the email address or domain in the Spam Whitelist text area.
-
Emails from these senders will bypass spam checks in the future.
-
You can add up to 30 entries using the exact email address or wildcards (
*) for the user and domain (e.g.*@friendlydomain.tld,name@*.tldor*@*.tld) -
For advanced users: It is also possible to whitelist IP addresses and netblocks of trusted mail servers.
-
-
To add an email address or domain to the blacklist:
-
Enter the email address or domain in the Spam Blacklist text area.
-
Emails from these senders will be blocked automatically.
-
You can add up to 30 entries using the exact email address or wildcards (
*) for the user and domain (e.g.*@spammerdomain.tld,name@*.tldor*@*.tld) -
For advanced users: It is also possible to blacklist IP addresses and netblocks of untrusted mail servers.

-
-
You can also remove entries from the whitelist or blacklist if necessary.
-
Click on the Change button to apply the changes.
This process helps ensure important emails are not missed and that unwanted emails are filtered out effectively.
Updated by SP on 12/11/2024


