This article is intended for cPanel users who want to secure their hosting account with an extra layer of protection.
Two-Factor Authentication (2FA) adds an extra security step when logging in to cPanel. In addition to your password, you’ll need a code from your phone’s authentication app (such as Google Authenticator or Duo, Authy or your password manager).
The setup only takes about 2 minutes.
Step 1: Log in to cPanel
If you’re not sure how to access cPanel, follow this guide:
🔗 Accessing your hosting control panel (cPanel)
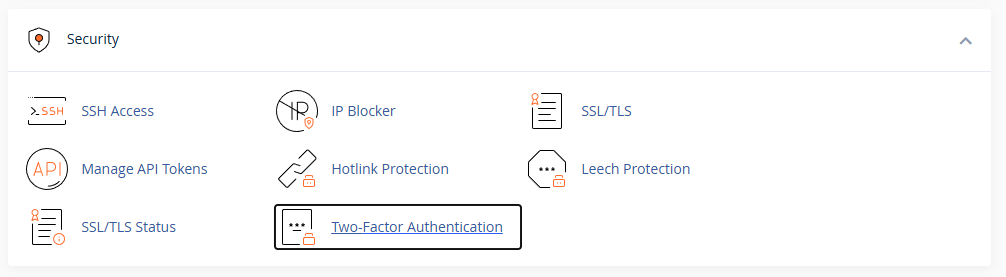
Step 2: Open the Two-Factor Authentication page
In the Security section, click Two-Factor Authentication:
You’ll see a message that 2FA is not yet configured:

Click Set Up Two-Factor Authentication.
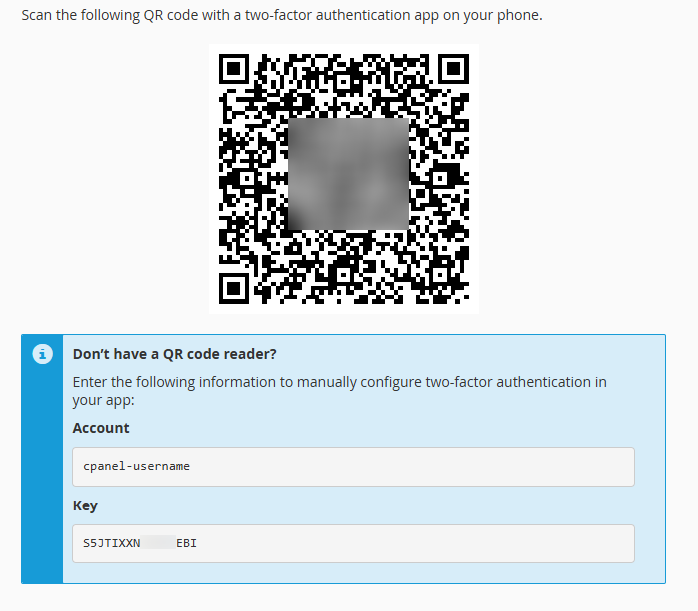
Step 3: Scan the QR code
Open your preferred 2FA app (such as Google Authenticator or Duo, Authy or your password manager) on your phone and scan the QR code displayed on the screen.
If you can’t scan, enter the Account and Key manually.
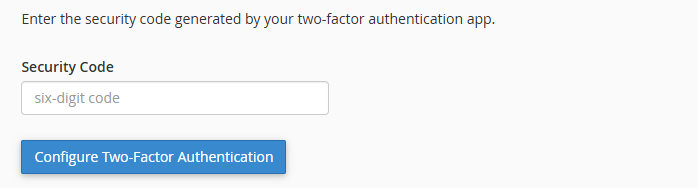
Step 4: Enter the 6-digit code
Your app will generate a 6-digit code.
Enter this code in the Security Code field and click Configure Two-Factor Authentication.
Step 5: Confirmation
You’ll see a success message confirming that 2FA has been configured.

From now on, every time you log in to cPanel, you’ll be asked for your password and a 6-digit code from your app.
If you ever need to reconfigure or remove 2FA, you can do so on the same page.

If you lose your phone or authentication device
If you no longer have access to the phone where your authenticator app was installed, please contact our support team.
We can disable 2FA for your cPanel account after verifying your identity. Once disabled, you can log in with your password and set up 2FA again with your new device.
Updated by SP on 11/11/2025


