This is a quick guide on how to review access on your Maxer account. This guide is intended to help ensure your account details are up-to-date and that the appropriate persons are added as Users & Contacts.
Please do NOT share the login details to your Maxer client account. If you want to provide access to a trusted person (for example a business colleague, an IT person or a web developer) please follow the steps in the article. You can invite the person to have their own user/login to your account - without risking losing your own access.
On your Maxer client account, you can add as many Users and Contacts as you need. A user is a trusted person who you grant access to manage aspects of your account. You can choose appropriate permissions based on their role. For example, a user can be granted access to view/open support tickets, view/pay invoices, and manage services and domains.
A contact is different to a user. A contact is a trusted person listed on your account who will receive copies of certain emails from us, and who may contact us to discuss certain issues relating to your account.
Please bear in mind that a trusted person can be a user, a contact or in many cases both.
For individual account holders, you may want to invite your website manager or web developer to be a User on your account. For businesses and organisations, it is best practice to have multiple Users and multiple Contacts, so that different team members can have different permissions and receive different email notifications, depending on their responsibilities.
(1) Review and update the main account details
In your Maxer account, navigate to My Account -> Account Details.
At the top of the page, please select your account type, such as "Personal Account", "Sole Trader / Freelancer", "Incorporated Entity" (such as a limited company), or "Unincorporated Association / Club". This will help our team identity the account holder.
We require a real first name and last name for the main account details. If you want to add a generic contact like "IT Helpdesk" or "Finance Team", please add them as an extra contact on the Contacts page (step 2 below).
Additionally, we do not accept PO box addresses.
(2) Review the list of Contacts
In your Maxer account, navigate to My Account -> Contacts.
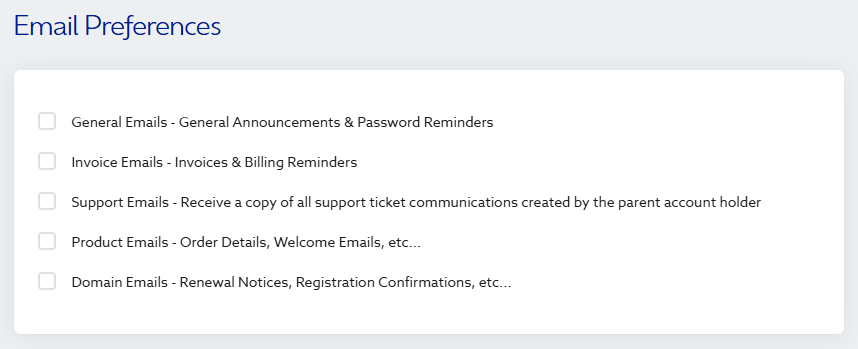
There is a dropdown list of all the contacts on your account. These are authorised contacts, who may contact Maxer for support, and you can opt for them to receive copies of emails. For example, if you tick the checkbox for "Invoice emails" they'll receive copies of all invoices and receipts. Consider adding a recovery email address as an additional contact, in case you lose access to your primary email address.
These are authorised contacts, who may contact Maxer for support, and you can opt for them to receive copies of email notifications. For example, if you tick the checkbox for "Invoice emails" the contact will receive copies of all invoices and receipts, and they may reach out to our billing team for help with billing inquiries.
(3) Review the list of Users
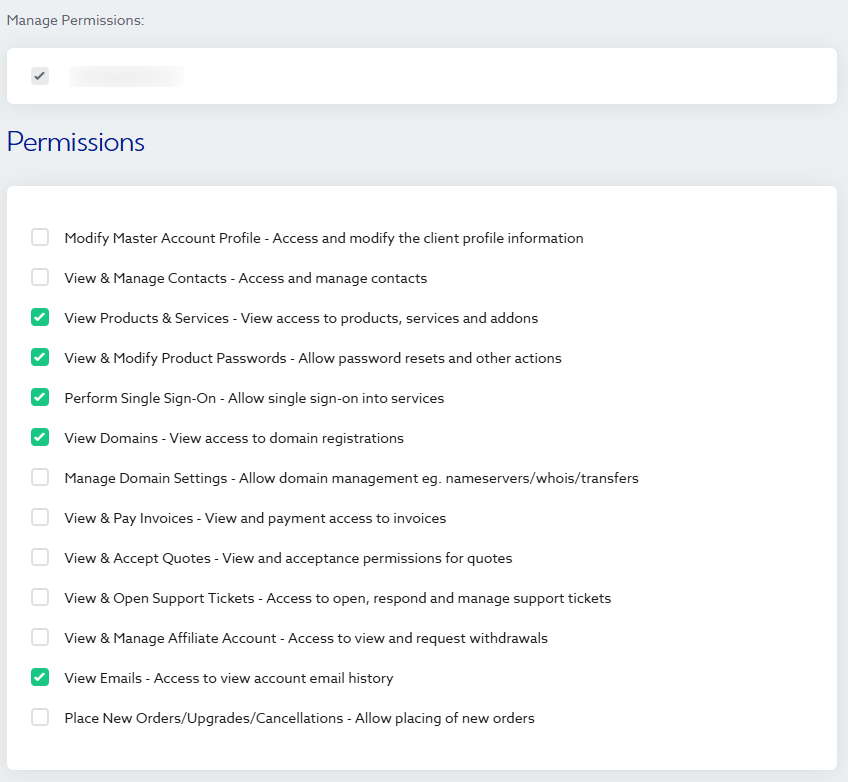
In your Maxer account, navigate to My Account -> User Management.
You can create as many users/logins as you need. Each user will have their own login to Maxer and have permission to manage aspects of the account. There is a long list of permissions to choose from. For example, if you are inviting your accountant or bookkeeper to access the account, you would tick the checkbox for "View & Pay Invoices", and possibly "View & Open Support Tickets".
Consider adding a recovery email address as an additional user, in case you lose access to your primary email address.
Updated by PA on 16/12/2024


