Both Windows, Linux, and Mac computers use a "hosts" file to map websites to an IP addresses. If an entry exists in the local "hosts" file for a domain, this will override any DNS value from your Internet provider, thereby allowing you to preview a new website only from your computer while the rest of the Internet sees the current/old website.
This is also useful if you have ordered a new domain name, but it's still being processed by the domain registry. You can use the local "hosts" file to point the domain name to the server's IP address, so the website is accessible for you locally and you can already start development/design work.
Please note that our free AutoSSL service will only issue an SSL certificate when the domain name is fully registered and pointed to our server, so in the mean time you will be able to access your website only through "http://" and not "https://". If you need to enable "https://", which is required by WordPress Admin Dashboard, please refer to this article to install a temporary self-signed SSL certificate: How to generate and install a self-signed SSL certificate
In the below examples, we are using the website address example.com and the IP address 123.45.67.89. Please change these with the actual values (your domain name and your account's IP address) when editing your hosts file!
Locating the Account's IP Address
The IP address for your hosting account can be found in the email "New Account Info" sent when you signed up for hosting. You can also find this in cPanel on the main page in the right sidebar under "Shared IP Address" (or "Dedicated IP Address" if you have one):
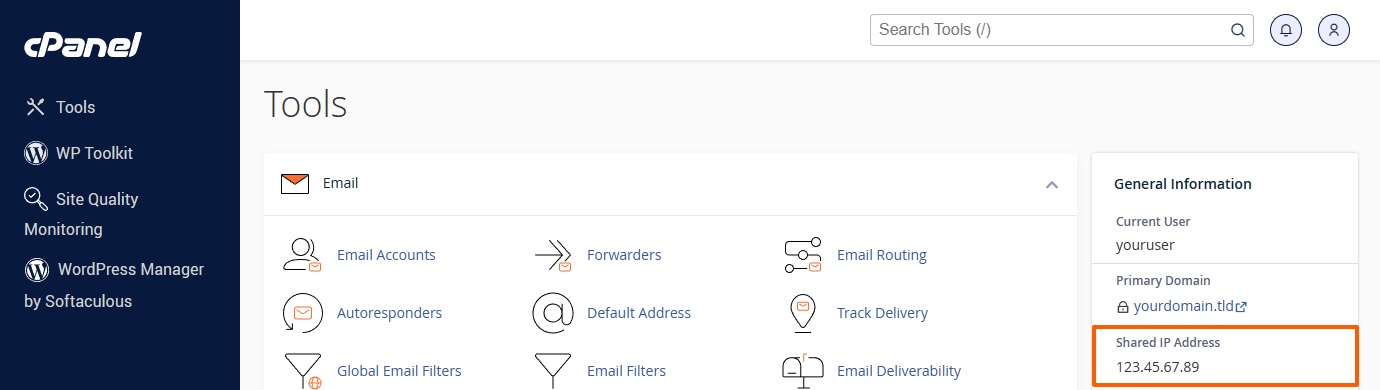
If you're not sure, please ask our support team for the correct IP address.
Simulating the DNS change on Microsoft Windows:
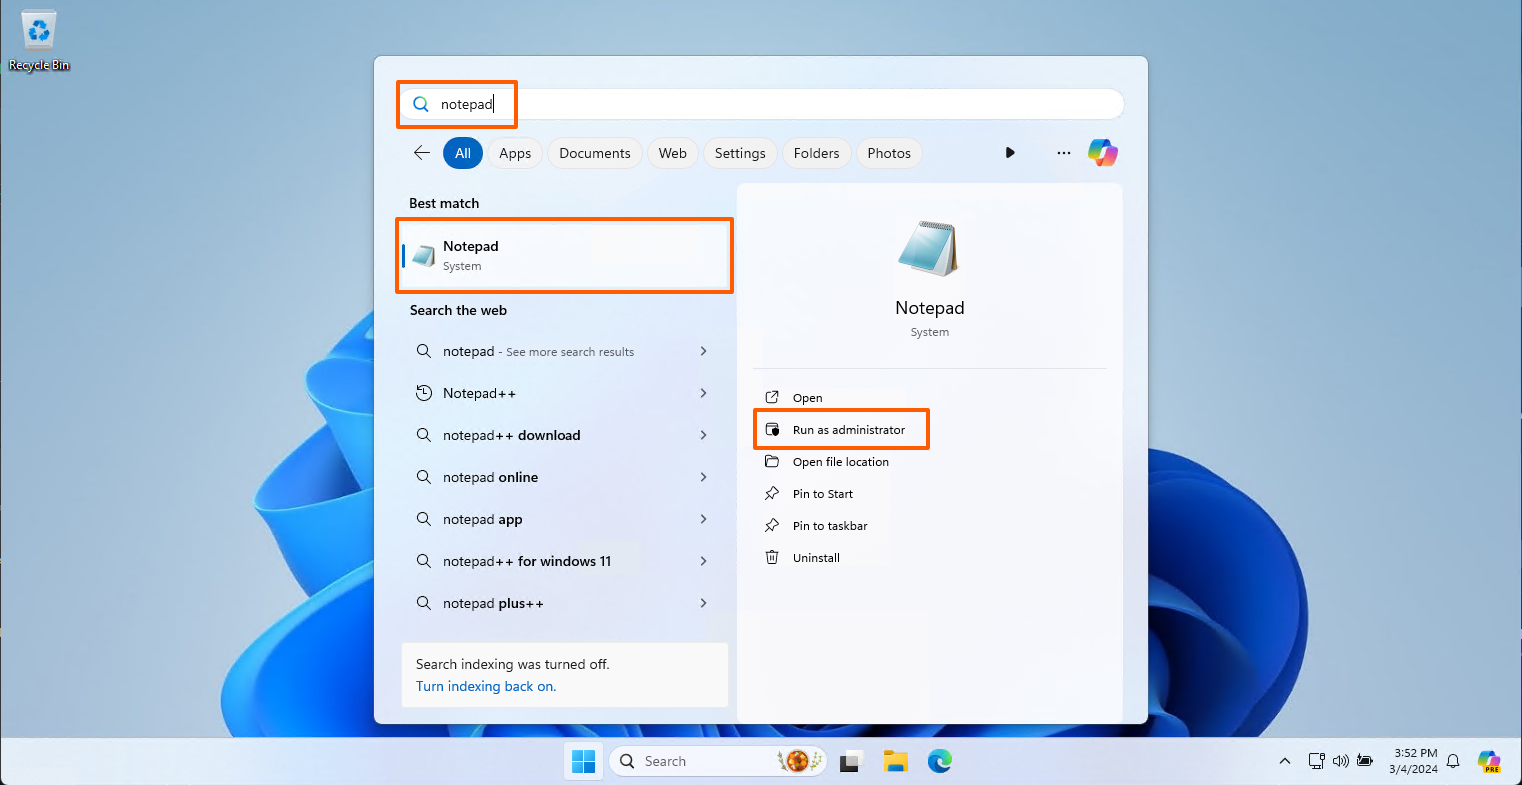
- Click on the Start button, type in "Notepad" in the search box and click on "Run as Administrator"
- If you can't find "Notepad", please try "Editor" instead
- Acknowledge the UAC dialog if it appears.
- In the Notepad window, click on File -> Open... (CTRL + O).
- Navigate to the directory
C:\Windows\System32\drivers\etc - In the drop-down menu, next to the "File name:" field, select "All Files".
- Select the file "
hosts" and click on the "Open" button: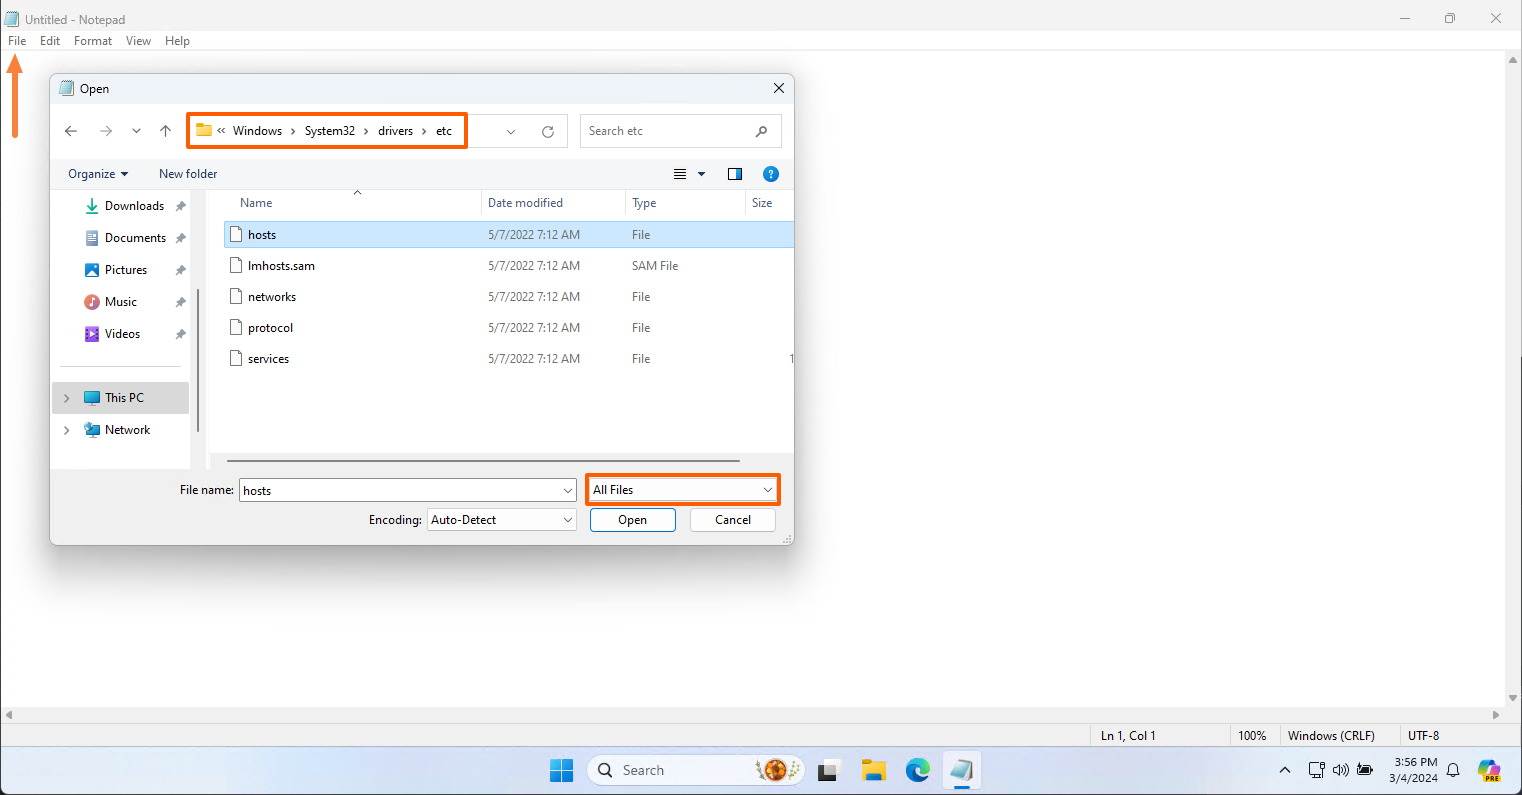
- At the end of the file, add two new lines with the server IP address and your domain name (one line for the root domain and another one for the "www" sub-domain).
- For example:
123.45.67.89 www.example.com123.45.67.89 example.com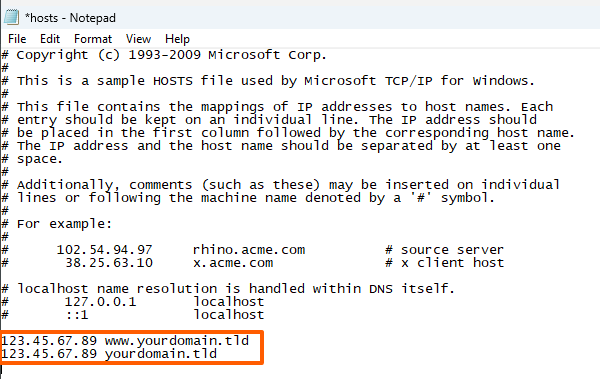
- For example:
- Click on File -> Save (CTRL+S) to save your changes.
- Go to www.example.com in your browser, and you will see the website served from the IP address that you've just specified.
- You may need to clear your browser cache and restart your browser for this change to take effect.
- After you're done previewing your website, don't forget to remove the two lines from the
hostsfile and save it.
Simulating the DNS change on macOS:
- Open the Terminal application, type
sudo nano /etc/hostsand enter your Mac account password. - Scroll to the bottom of the
hostsfile and add two new lines with the server IP address and your domain name (one line for the root domain and another one for the "www" sub-domain).- For example:
123.45.67.89 www.example.com123.45.67.89 example.com
- For example:
- Save the changes with CTRL+O and enter to confirm.
- Go to www.example.com in your browser, and you will see the website served from the IP address that you've just specified.
- You may need to clear your browser cache and restart your browser for this change to take effect.
- After you're done previewing your website, don't forget to remove the two lines from the
hostsfile and save it. - Exit the file with CTRL+X.
Enabling the HTTPS Protocol
Generating and installing a self-signed SSL certificate is necessary if you need to access certain URLs where a secure connection is enforced, requiring the HTTPS protocol. A self-signed SSL certificate is a temporary solution to enable the HTTPS protocol (e.g., https://www.example.com). WordPress enforces this for the login URL and the WordPress Admin Dashboard URLs.
Here's how you can enable it: How to generate and install a self-signed SSL certificate
Need an alternative method?
Alternatively, we recommend setting up an alias domain or sub-domain to preview the website, for example dev.example.com:
- Log in to your cPanel account (see here how).
- Navigate to the Domains category and click on the Domains icon.
- Click on the "Create A New Domain" button.
- In the Domain input field, enter the sub-domain that you would like to create, or the alias domain that you would like to add.
- For example: dev.example.com
- Under Document Root (File System Location), leave the checkbox next to "Share document root" ticked.
- Click on the Submit button.
- Finally, at the current provider, you would need to add a CNAME DNS record for dev.example.com pointing to the appropriate IP address (for example 123.45.67.89).
- Wait a few minutes for the change to apply, then go to dev.example.com in your browser, and you should see the website served from the IP address that you've just specified.
- After you're done previewing your website, don't forget to remove the sub-domain from the Domains page and the related DNS record.
Update from January 2020: Due to a conflict between Mod_userdir (the "Temporary URL" site preview) and Mod_passenger (which is now installed on our servers for Node.js applications), we now recommend previewing a new/transferred website by editing the "hosts" file on your local computer, as described above.
Updated by SP on 04/03/2024


