In this guide, we'll walk you through the process of generating and installing a self-signed SSL certificate in cPanel.
Although our AutoSSL system automatically issues, renews and installs SSL certificates for all domains that point to our servers, generating a self-signed SSL certificate is sometimes necessary if you need to preview a transferred site before pointing its domain to our nameservers. Installing the self-signed SSL certificate enables the HTTPS protocol (e.g. https://www.example.com). WordPress enforces it for the login URL and the WordPress Admin Dashboard URLs.
Step 1: Accessing cPanel
Firstly, log in to your cPanel account: Accessing your hosting control panel (cPanel)
Step 2: Locating the "SSL/TLS" Page
Once logged in, scroll down or use the search bar to locate the "SSL/TLS" icon. Click on it to access the SSL management interface: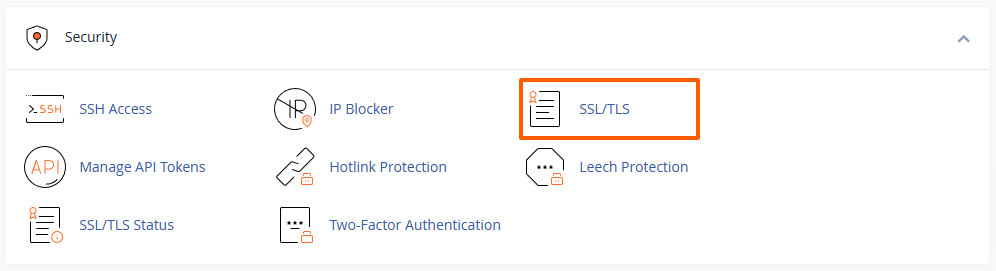
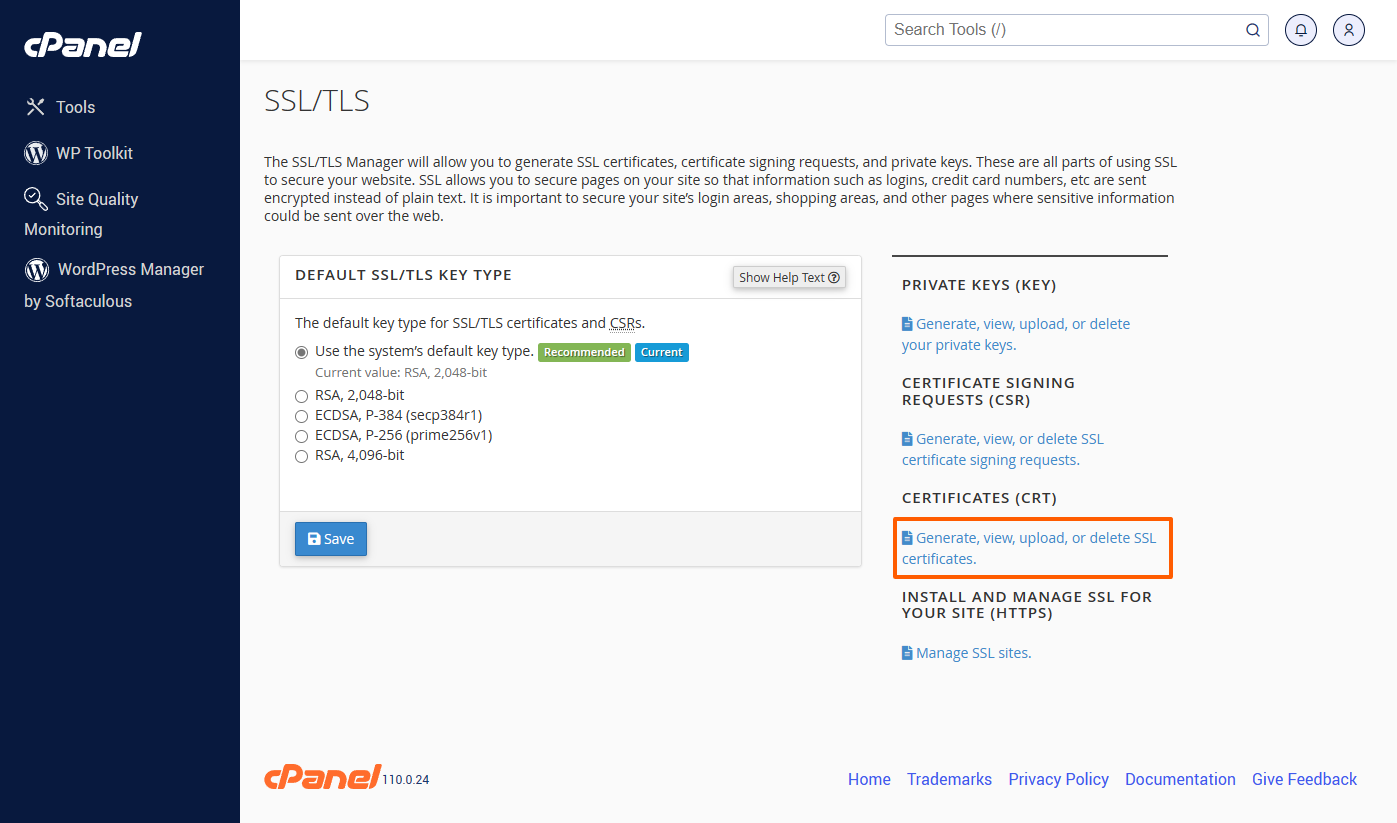
Step 3: Generating a Self-Signed Certificate
Within the SSL/TLS Manager, you will find various options related to SSL certificates. To generate a self-signed certificate, click on the "Generate, view, upload, or delete SSL certificates" option:
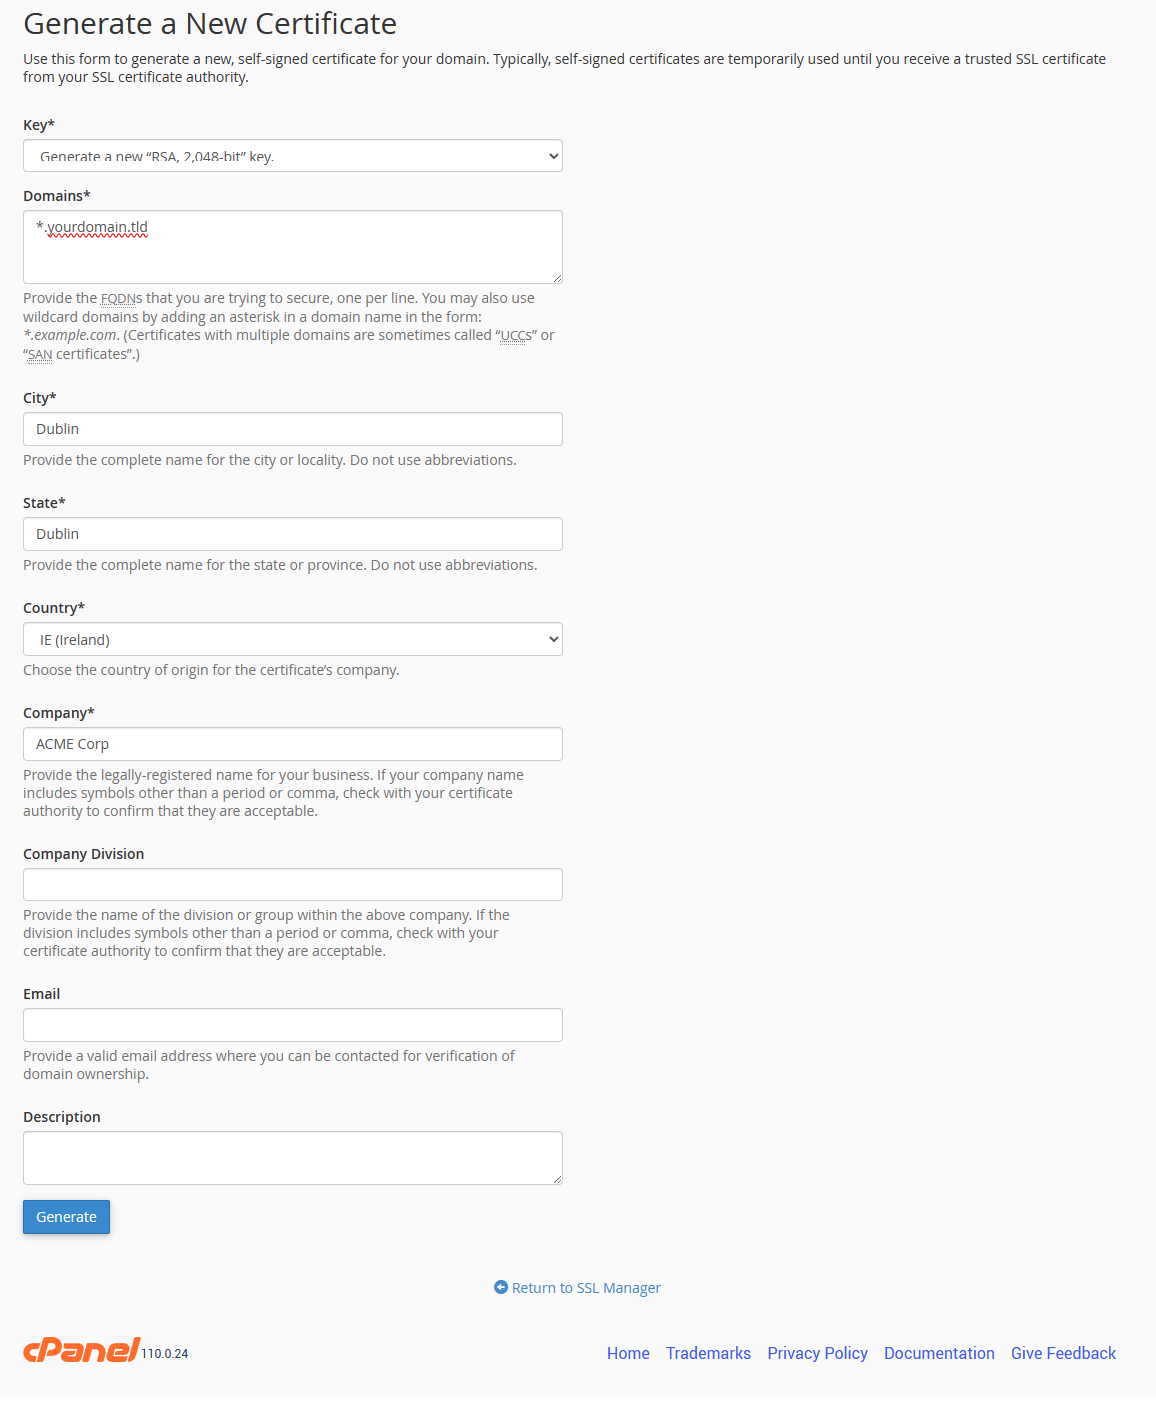
Next, navigate to the "Generate a New Certificate" section. There you will be prompted to enter the following information:
- Key - Select the option "Generate a new “RSA, 2,048-bit” key."
- Domains - Enter the domain name and sub-domains for which the SSL certificate should be generated.
- You may also use wildcard domains by adding an asterisk in a domain name in the form:
*.example.com
- You may also use wildcard domains by adding an asterisk in a domain name in the form:
- City - Enter the city of the site's or company's location.
- State - The state in which the city is located.
- Country - The country.
- Company - The company name; alternatively the site's name or your own name.
- The other information is optional and can be skipped.
The information that you enter here is not important, as this should be just a temporary SSL certificate for testing purposes.
Click on the "Submit" button to generate the self-signed SSL certificate.
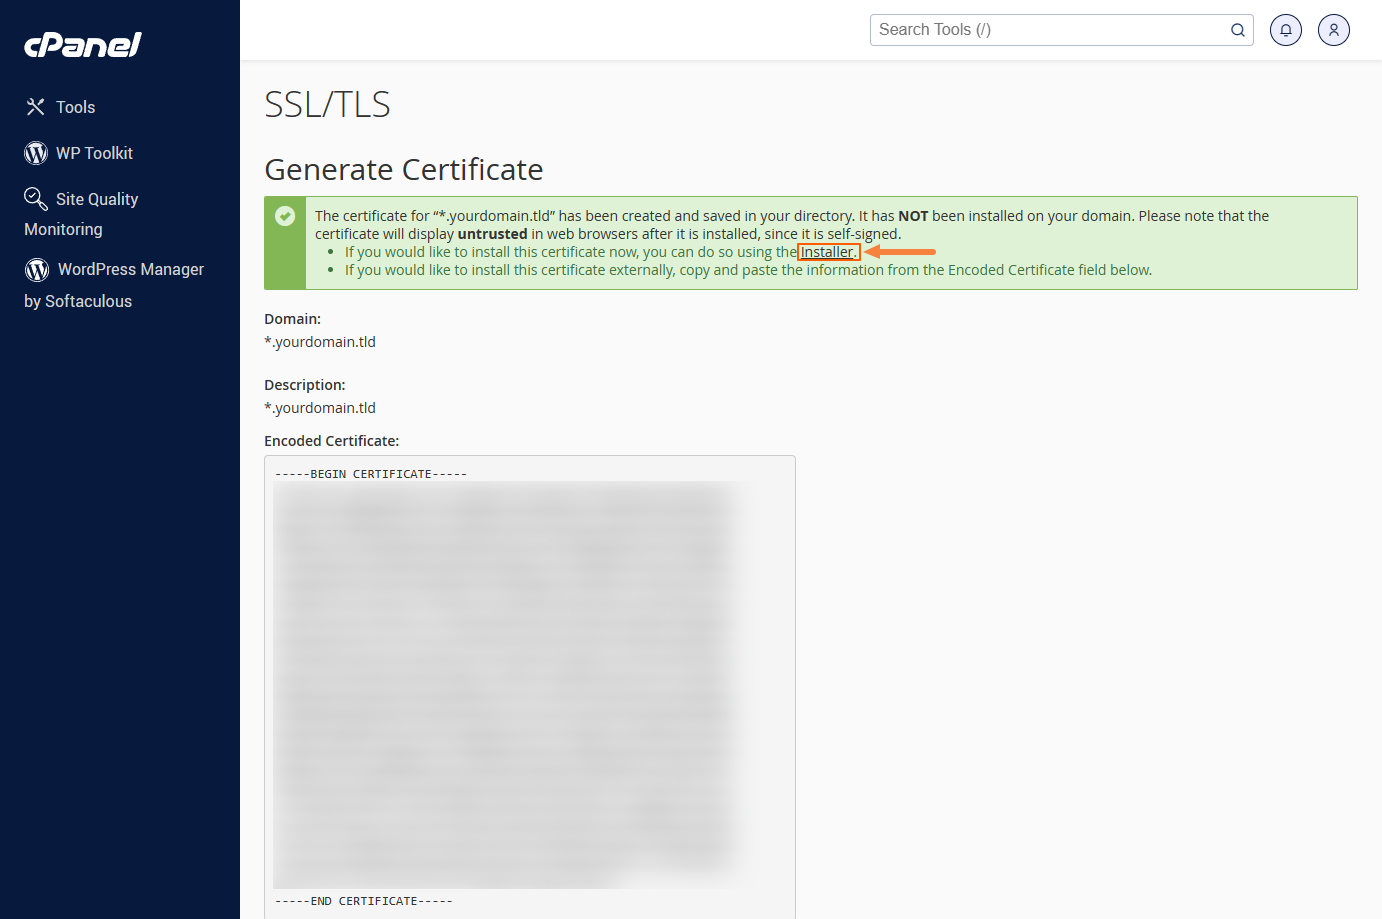
Step 4: Installing the Self-Signed Certificate
After generating the certificate, you'll be redirected to a page displaying the newly created certificate along with its key and certificate signing request (CSR). Click on the "Installer" link to proceed to the page where you can install the generated SSL certificate:
Locate the "Install an SSL Website" section.
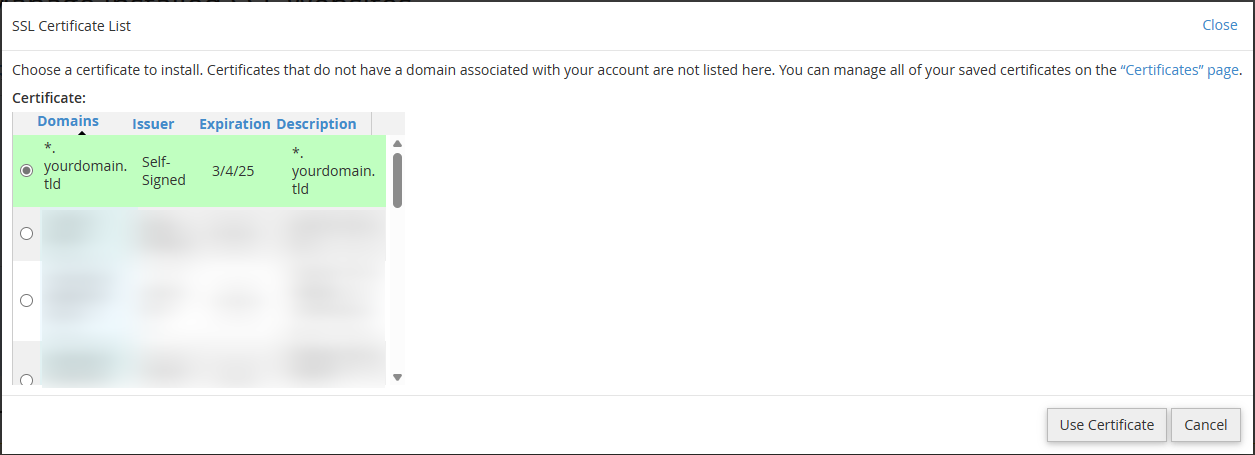
Under this section, click on the "Browse Certificates" button:

Select the self-signed SSL certificate that you've generated from the list and click on the "Use Certificate" button:
In the "Domains" drop-down menu, select the domain name for which you've generated the SSL certificate. This should already be selected, unless you have multiple domains.
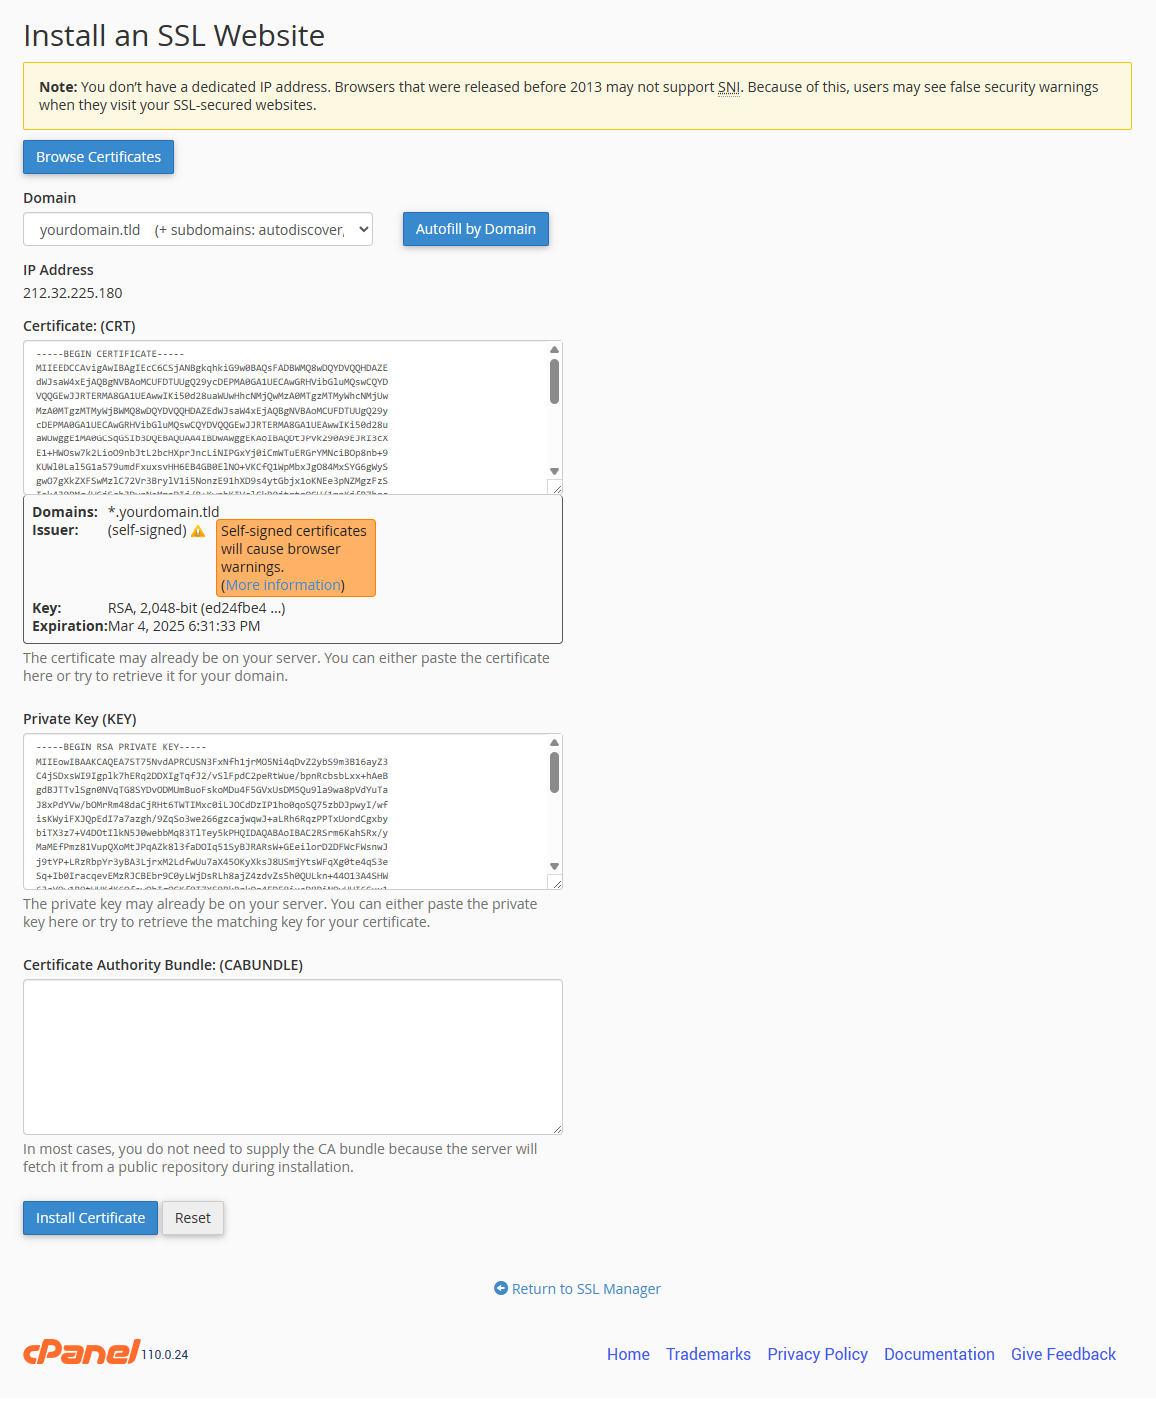
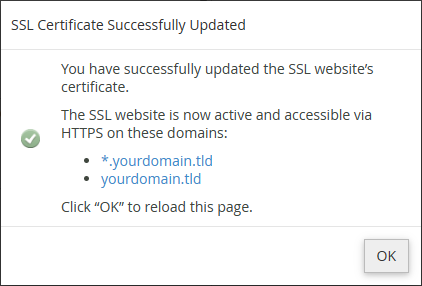
Once done, click on the "Install Certificate" button. cPanel will then install the self-signed SSL certificate for your domain and enable HTTPS for it:
Step 5: Verifying the Installation
To ensure that the SSL certificate is properly installed, you can visit your website using the HTTPS protocol (e.g., https://example.com).
Most modern web browsers will display a padlock icon in the address bar, indicating a secure connection. Please ignore any errors or warnings from your browser. These are normal for self-signed SSL certificates.
Conclusion
Generating and installing a self-signed SSL certificate in cPanel is a straightforward process that allows you to secure your website temporarily or for internal use. However, it's essential to note that self-signed certificates do not provide the same level of trust and security as certificates issued by trusted CAs. Therefore, they should only be used in scenarios where trust isn't a primary concern, such as development environments or internal networks.
AutoSSL will automatically replace the self-signed SSL certificate and install a valid signed SSL certificate within 24 hours after the domain points to our server or nameservers.
Updated by SP on 04/03/2024


