This article shows you how to add a domain to Cloudflare using a full DNS setup. Cloudflare hosts the DNS records and proxies your website traffic, while email, FTP and cPanel access continue to connect directly to your Maxer server.
Before you begin
With a full DNS setup, the nameservers for your domain change from Maxer to Cloudflare. From then on, DNS records are managed in Cloudflare, and only the records you choose are proxied.
| Area | Before | After |
|---|---|---|
| DNS hosting and nameserver authority | Maxer nameservers | Cloudflare nameservers |
| Website traffic (CDN and proxy) | Connects directly to your server | Passes through Cloudflare for records set to Proxied |
| Email, FTP, cPanel and WHM | Connect directly to your server | No change. These records must stay DNS only |
You will need:
- A Cloudflare account. If you do not have one, you can create a free account at dash.cloudflare.com.
- Access to the place where the nameservers for your domain are managed. This is your domain registrar, or the Domains section of your Maxer client area if the domain is registered with Maxer.
- A live Maxer hosting account for the domain, so that Cloudflare can import its current DNS records.
The nameserver change typically takes 1 to 2 hours, but can take up to 24 hours. Your website and email keep working during this time, provided the imported DNS records match your current ones. Avoid making DNS changes until the setup is complete.
The screenshots in this article use the example domain example.com. Cloudflare updates its dashboard from time to time, so some labels may look slightly different.
Add your domain to Cloudflare
Step 1: Enter your domain name
- Log in to the Cloudflare dashboard.
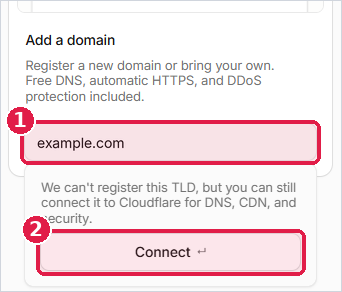
- On Account home, find the Add a domain box and enter your domain name (1). Enter it without
wwworhttps://, such asexample.com. - Click Connect (2).
Step 2: Connect your domain
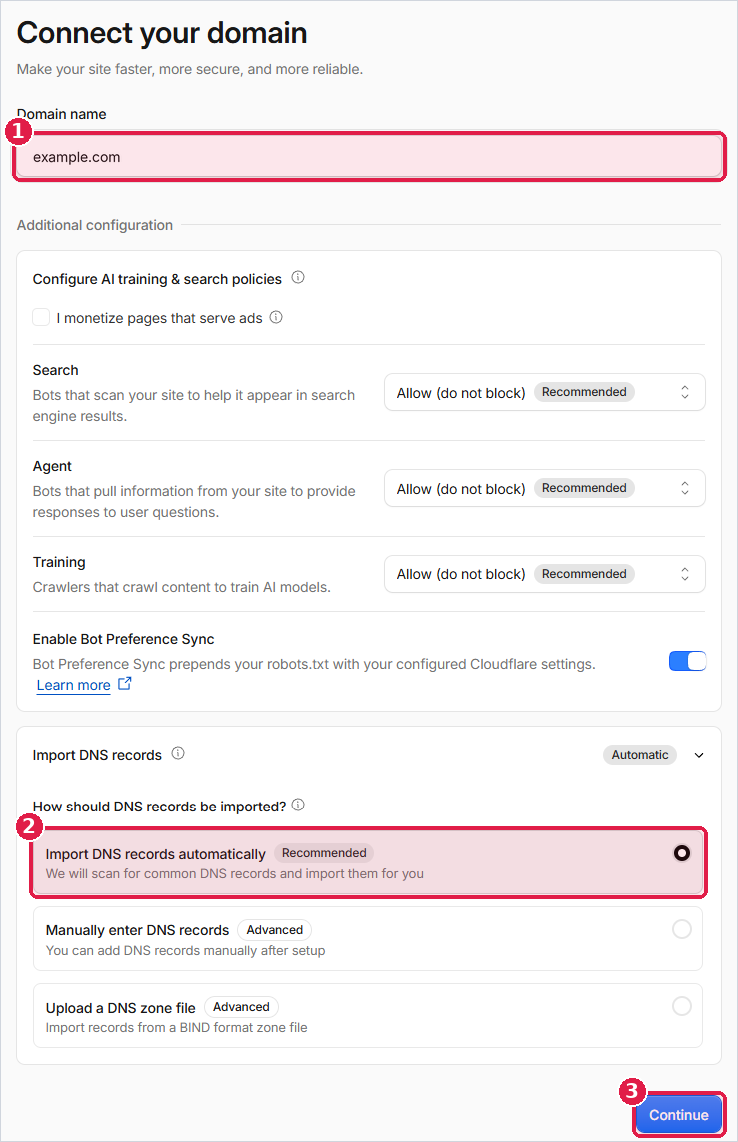
- Check that the domain name is correct (1).
- Leave the AI crawler and bot settings at their defaults unless you have a specific reason to change them. You can review these settings later in your Cloudflare dashboard.
- Under Import DNS records, leave Import DNS records automatically selected (2). Cloudflare will scan the current DNS records for your domain and import them.
- Click Continue (3).
Step 3: Select the Free plan
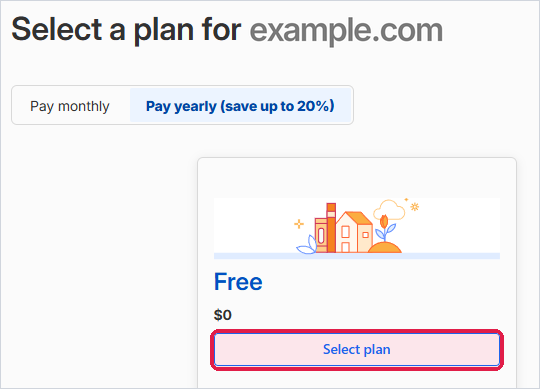
Click Select plan under Free. The Free plan is enough for the steps in this article. You can change plan later if you need to.
Review your DNS records
Step 4: Check the imported records
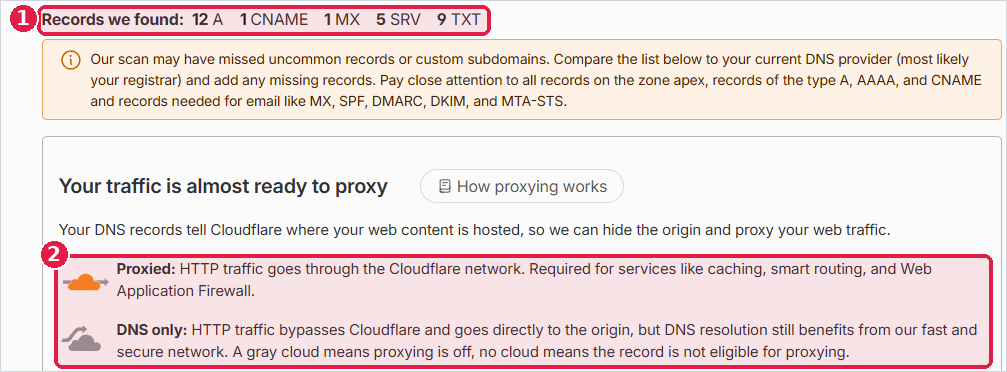
Cloudflare lists the DNS records it found for your domain (1). Compare this list with the records in the DNS Zone Editor in your cPanel account and add anything that is missing. Cloudflare warns that its scan can miss uncommon records, so pay particular attention to custom subdomains and to email records such as MX, SPF, DKIM and DMARC.
By default, Cloudflare sets every A and CNAME record to Proxied (orange cloud), which sends web traffic through Cloudflare. Records set to DNS only (grey cloud) point directly to your server (2).
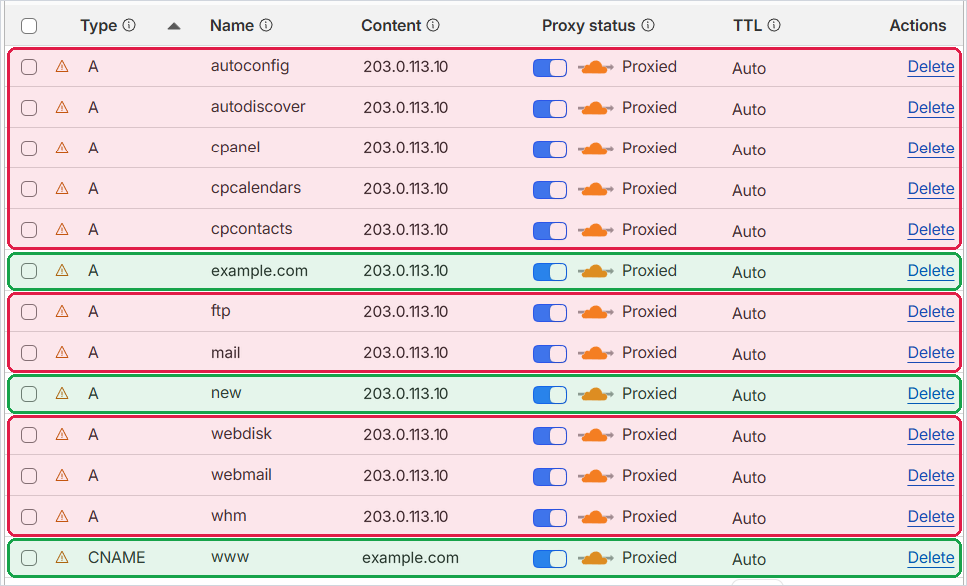
Step 5: Set non-website records to DNS only
Cloudflare only proxies web traffic (HTTP and HTTPS). It does not proxy cPanel, WHM, webmail, FTP or email services (SMTP, IMAP and POP3). If these records stay Proxied, your email program, FTP client and cPanel logins connect to Cloudflare instead of your server, and they fail.
Set the records as follows:
| Record name | Used for | Proxy status |
|---|---|---|
Your domain (example.com), www, and any other subdomain that serves a website |
Website | Proxied |
mail |
Email program hostname | DNS only |
ftp |
FTP | DNS only |
cpanel, whm, webmail, webdisk, cpcalendars, cpcontacts |
cPanel, WHM, webmail, Web Disk, calendar and contacts services | DNS only |
autoconfig, autodiscover |
Email program auto-configuration | DNS only |
MX, TXT and SRV records cannot be proxied, so they already show DNS only. Any A or CNAME record that is not used for a website should also be set to DNS only.
To change the proxy status:
- Tick the box beside each record that should be DNS only (the records outlined in red above).
- Click Edit followed by the number of selected records, above the table. For example, Edit 10 records.
- In the Edit proxy status window, switch Proxy status to DNS only (1).
- Click Save (2).
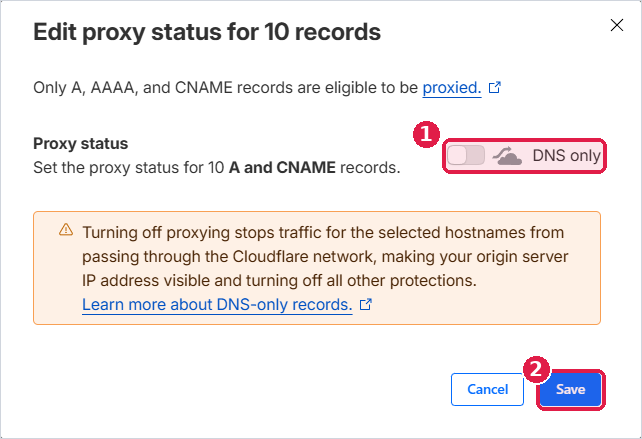
When you are finished, check the Proxy status column. Your website records should show Proxied (green) and all other A and CNAME records should show DNS only (red).

Email records
If your email is hosted on your Maxer server, check these two records before you continue:
- The MX record must point to a hostname that is set to DNS only. Our standard setup points the MX record to
mail.example.com. mail.example.comshould be an A record that points to your server's IP address, set to DNS only. If it is a CNAME that points to your domain name, replace it with an A record. You can find your server's IP address under General Information on the main page of your cPanel account (Shared/Dedicated IP Address).
If your email is hosted elsewhere, for example with a third-party email provider, keep your MX records as they are.
Step 6: Continue to activation
Scroll to the bottom of the page and click Continue to activation.

Change your nameservers
Step 7: Replace your nameservers with the Cloudflare nameservers
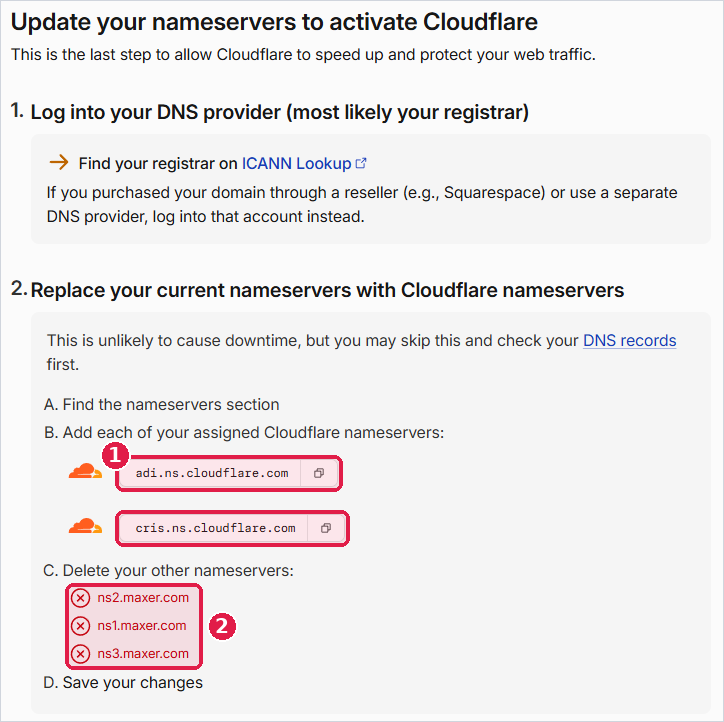
Cloudflare now shows two nameservers assigned to your account (1). These are different for every account, so use the ones shown in your own dashboard and not the ones in the screenshot below.
- Log in to the place where the nameservers for your domain are managed. This is usually your domain registrar. If your domain is registered with Maxer, use the Maxer client area.
- Open the nameserver settings for the domain.
- Add both Cloudflare nameservers.
- Delete the existing nameservers (2). In the example these are the Maxer nameservers. You can use the copy button beside each Cloudflare nameserver to avoid typing mistakes.
- Save your changes.
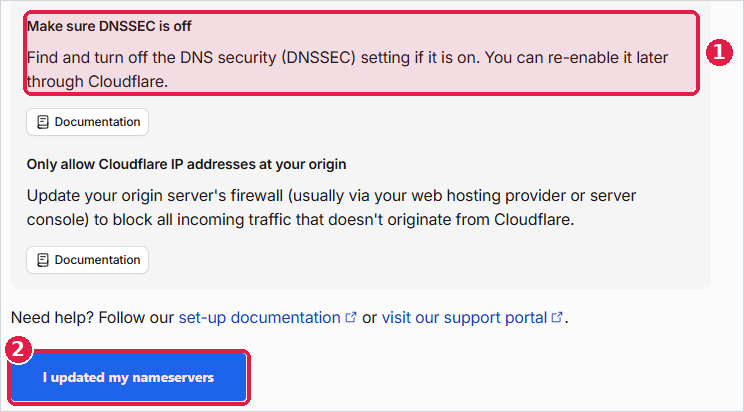
Before you click the confirmation button, read the Recommended section at the bottom of the page:
- Make sure DNSSEC is off (1). If DNSSEC is enabled for your domain at your registrar, turn it off before you change the nameservers. You can enable it again later through Cloudflare.
- Only allow Cloudflare IP addresses at your origin. This refers to the server firewall. On shared and Enterprise hosting the firewall is managed by Maxer and cannot be changed from your account, so there is nothing for you to do here.
Once you have saved the new nameservers, click I updated my nameservers (2).
Step 8: Wait for Cloudflare to verify the change
Cloudflare checks your nameservers periodically (1). This typically takes 1 to 2 hours, but can take up to 24 hours depending on your registrar. To trigger a check straight away, click Check nameservers now (2).
Until the change completes, your Maxer nameservers are still in use. Do not make DNS changes in cPanel during this time. If a change cannot wait, make the same change in Cloudflare as well.

Step 9: Confirm that your domain is active
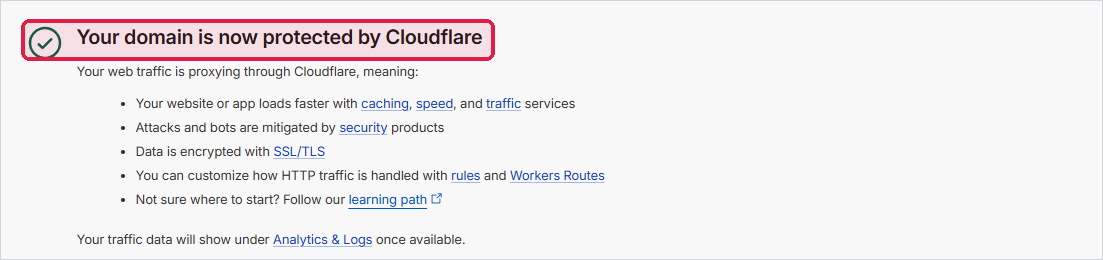
When the change is complete, Cloudflare shows Your domain is now protected by Cloudflare and usually sends you an email as well.
Then check that everything works:
- Open your website and confirm that it loads over HTTPS.
- Send a test email to your address, and send one from it.
- Log in to Webmail, or check your email program, to confirm it can still connect.
After activation
-
Keep Cloudflare and the DNS Zone Editor in sync. Once your domain uses the Cloudflare nameservers, the internet gets its DNS answers from Cloudflare. However, our server's own DNS service still refers to the local DNS zone for your domain on the server. The DNS records in Cloudflare must therefore match the records in the DNS Zone Editor in your cPanel account. When you add, change or delete a record, make the same change in both places. This includes records that cPanel creates for you, such as a new subdomain or an updated SPF or DKIM record. Add these in Cloudflare under DNS > Records as well. Set new website subdomains to Proxied and anything that is not a website to DNS only.
-
SSL/TLS mode. Cloudflare's Automatic SSL/TLS normally selects a suitable encryption mode. If your website shows a redirect loop or a 52x error after activation, open SSL/TLS in Cloudflare and check that the mode is Full or Full (strict), and not Flexible.
-
Certificate issuance. After activation, Cloudflare issues an Edge Certificate for your domain. This can take up to 24 hours. Until it is issued, your website may fail to open over HTTPS. You can check the status under SSL/TLS > Edge Certificates in Cloudflare. If your website does not open because of this, temporarily set your website records (your domain and
www) to DNS only to bypass Cloudflare. Set them back to Proxied once the Edge Certificate shows as Active.
Related articles:
Troubleshooting
-
Your email program cannot connect, or email is not arriving. Check that the
mailrecord and your MX target are set to DNS only. Look upmail.example.comwith an online DNS lookup tool. It should return your server's IP address. If it returns a Cloudflare address, the record is still proxied, or it is a CNAME that points to a proxied record. Replace it with an A record that points to your server's IP address, set to DNS only. -
cPanel, webmail or FTP no longer connect or work correctly using your domain name. Check that the
cpanel,webmail,ftpandwhmrecords are set to DNS only. -
Your website shows a redirect loop or a 52x error. Check the SSL/TLS mode as described under After activation.
-
Your website does not open over HTTPS shortly after activation. The Edge Certificate may not have been issued yet. See Certificate issuance under After activation.
-
A record or subdomain stopped working after the switch. It was probably not imported. Compare Cloudflare with your DNS Zone Editor in cPanel and add the missing record under DNS > Records in Cloudflare.
If you still need help, please open a ticket from your Maxer client area and include your domain name and the step you are on.
Updated by SP on 14/10/2026