Squarespace offers an intuitive platform for building and hosting websites, and connecting your custom domain name to your Squarespace site is essential for establishing your online presence. While Squarespace provides detailed instructions for domain connection, if your domain is managed through cPanel, you can utilize the DNS Zone Editor to make the necessary DNS changes. This guide will walk you through the process of connecting a domain name to Squarespace using cPanel's DNS Zone Editor.
Squarespace currently provides the following guide with the necessary DNS records:
A more detailed setup guide is available here:
Please note that the at sign (@) under "Alias" or "Host" refers to the root domain name (e.g. example.com). You will need to enter your domain name in cPanel on the "Zone Editor" page in the "Valid zone name" input field, instead of the at sign.
Notes and Prerequisites:
- Your domain name must point to our nameservers.
- The domain name must either have its own cPanel account, or it can be added to an existing cPanel account. This is necessary for the DNS service.
- We offer the cPanel DNS Connect service that is perfect for this purpose. This plan also includes unlimited email forwarders, but no email accounts.
- If you need to setup email accounts, a regular hosting plan (e.g. Plan 1) is necessary instead.
- Alternatively, we also offer a separate email service - OX App Suite. This replaces the email functions in cPanel completely, regardless of the hosting plan.
- External email services (e.g. Google Workspace, Office 365) can be connected with the cPanel DNS Connect plan as well as any regular hosting plan, such as Plan 1.
Step 1: Access cPanel
- Log in to your cPanel account using your credentials - Accessing your hosting control panel (cPanel)
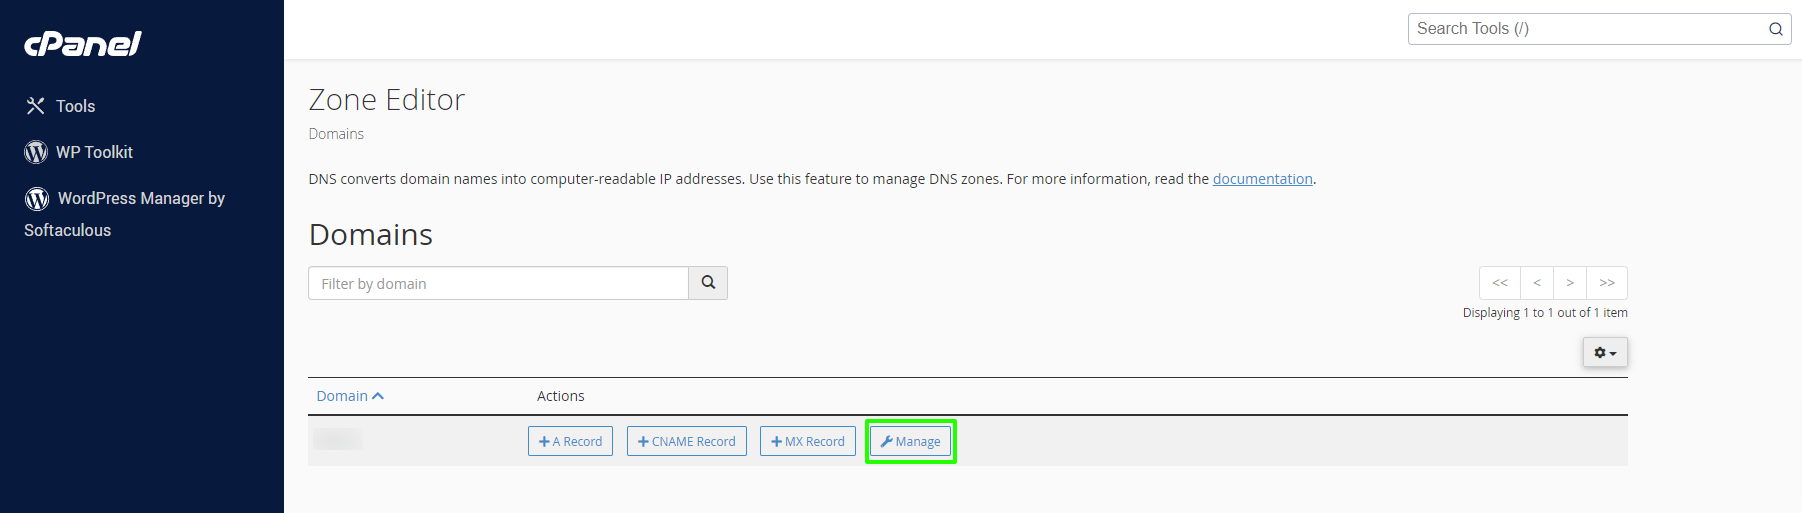
- Navigate to the "Domains" section and locate the "Zone Editor" button:

Step 2: Identify Your Domain
- In the Zone Editor interface, you will see a list of domains associated with your cPanel account. Identify the domain you want to connect to your Squarespace site.
Step 3: Add DNS Records for Squarespace
- Click on "Manage" next to the domain you wish to connect:
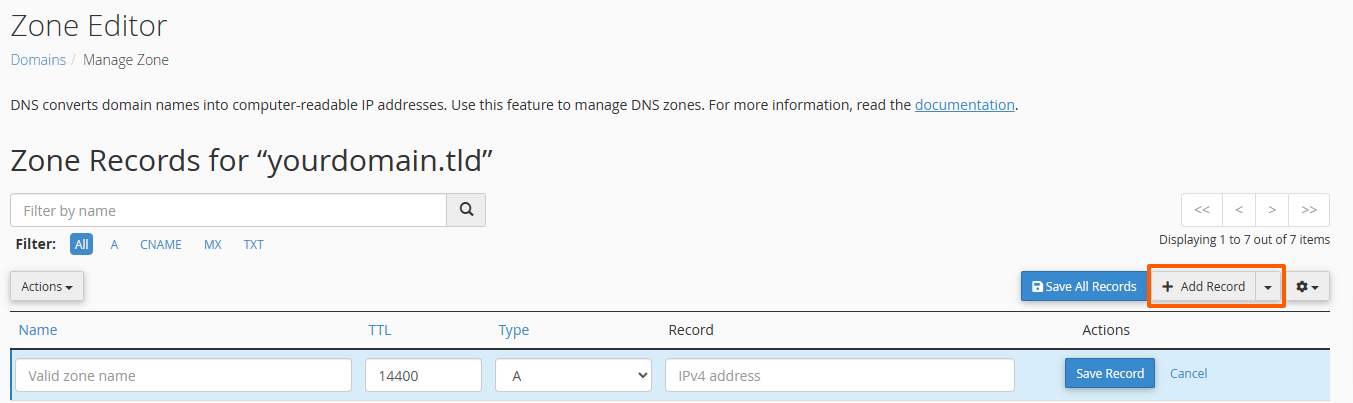
- Look for any existing DNS records related to your domain (e.g., A, CNAME, MX records) that you will edit and make note of them for reference.
For example, you can print the page as a PDF document or take a full page screenshot. - Add the necessary DNS records provided by Squarespace for connecting your domain. These typically include:
- A records pointing to Squarespace's IP addresses.
- CNAME records for verifying domain ownership and configuring subdomains.
- AAAA records if Squarespace supports IPv6 addresses and provides such records.
- Enter the relevant information for each DNS record as instructed by Squarespace. Ensure accuracy to prevent any connectivity issues.
- Certain DNS records may already exist, such as the A record for the root domain, or the CNAME record for "www" sub-domain. These DNS records would need to be changed using the "Edit" button, not added as new DNS records.
- Please note that the at sign (
@) under "Alias" or "Host" refers to the root domain name (e.g.example.com). You will need to enter your domain name in the "Valid zone name" input field, instead of the at sign.
Step 4: Save Changes
- Once you've added all required DNS records, review the changes to ensure accuracy.
- Click on the "Save All Records" button to apply the DNS modifications.
Step 5: Verify Domain Connection on Squarespace
- Log in to your Squarespace account and navigate to the Domains section.
- Select the option to "Connect a domain" or "Add a domain".
- Enter your domain name and follow the prompts to connect it to your Squarespace site.
- Squarespace may prompt you to verify domain ownership by adding a TXT record or CNAME record in your DNS settings. If required, return to cPanel's DNS Zone Editor and add the verification record provided by Squarespace.
- Once the domain connection is verified, Squarespace will confirm successful integration, and your domain will be connected to your Squarespace site.
Step 6: Test Domain Connectivity
- After completing the domain connection process, allow some time for DNS propagation to take effect. It may take a few minutes to several hours for the changes to propagate globally.
- Test the connectivity of your domain by entering the domain name in a web browser and confirming that it directs to your Squarespace website.
- Test the email deliverability by sending and receiving an email from/to an email account on your domain (if applicable). This is necessary to assure that the email-related DNS settings have not been affected during this process.
Important Notes:
- Any change of DNS settings can generally take up to 24 hours to fully apply.
- Squarespace suggests even up to 72 hours for new domains to become fully available.
- During this time period, it's possible that certain functions of your domain name and your Squarespace website may not function correctly.
- The SSL certificate and HTTPS version of your website will not be available immediately. Both of these functions are served by the web server - in this case by Squarespace.
- Please refer to this article at Squarespace for more information: Understanding SSL certificates – Squarespace Help Center
- Our AutoSSL system will technically no longer be able to issue, renew or install SSL certificates for domains and sub-domains that point to Squarespace. Any errors that you may receive from cPanel or on the "SSL/TLS Status" page in cPanel can be ignored.
- It's recommended to disable AutoSSL for the root domain and the "www" sub-domain to prevent any errors or confusion.
Conclusion
Connecting your domain name to Squarespace using cPanel's DNS Zone Editor is a straightforward process that allows you to leverage Squarespace's powerful website-building features with your custom domain. By following the steps outlined in this guide and accurately configuring the DNS records, you can seamlessly integrate your domain with your Squarespace site and establish a professional online presence.
Updated by SP on 31/01/2025


