WordPress plugins play a crucial role in extending the functionality of your website, allowing you to add features, enhance performance, and customize your site to meet specific needs. However, there are situations where you might need to disable or enable plugins, whether it's for troubleshooting, maintenance, or security reasons.
cPanel, a popular web hosting control panel, provides a powerful tool called WordPress Management (formerly WP Toolkit), which simplifies the management of WordPress installations. In this guide, we will walk you through the steps to disable and enable WordPress plugins using WordPress Management in cPanel.
Step 1: Accessing cPanel
To begin, please log in to cPanel. This is the control panel where you can manage various aspects of your website, including WordPress installations.
Accessing your hosting control panel (cPanel)
Step 2: Locating WordPress Management
Once inside cPanel, search for the WordPress Management icon in the "Software" group or in the left sidebar.

Step 3: Finding Your WordPress Installation
On the WordPress Management overview page, you will see a list of all the WordPress installations associated with your hosting account.
If there are no existing WordPress installations added to WordPress Management, please click on the "Scan" button and WordPress Management will look for existing WordPress sites on your hosting account:
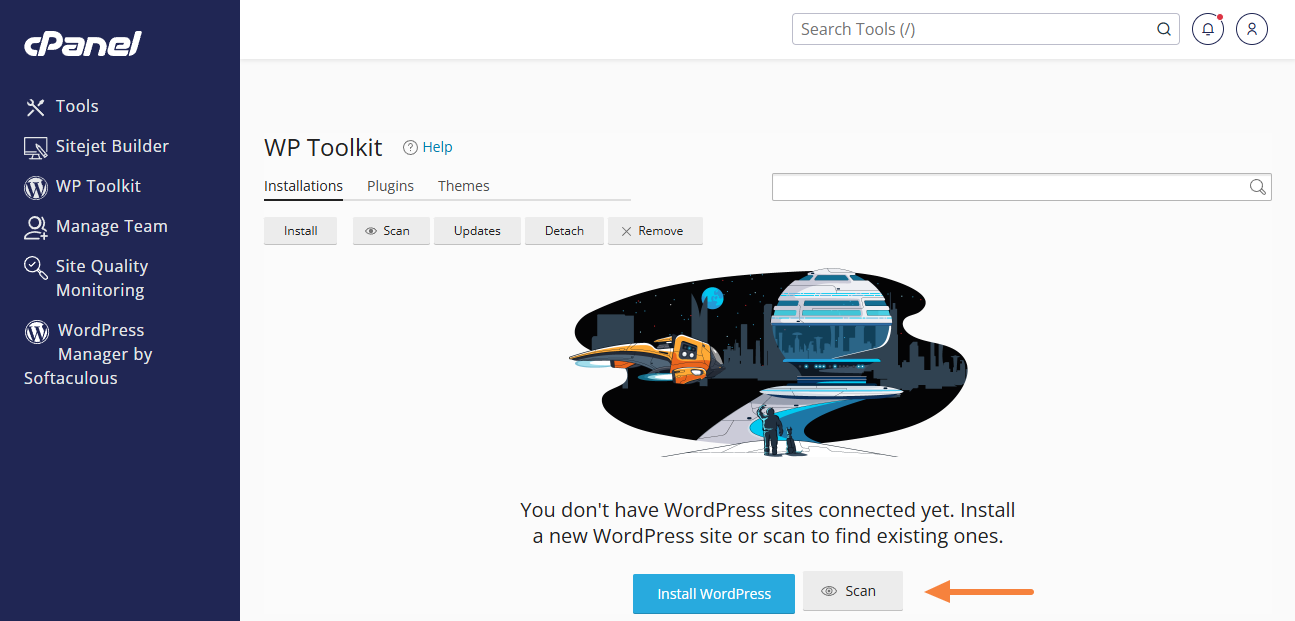
Note: If no WordPress site can be found, please assure that there is no existing file named .wp-toolkit-ignore in the main directory of the site.
Locate the specific website and click on the toggle on the left to pull down the site's overview:

Step 4: Click on the "Plugins" Tab
Within the WordPress Management interface for your chosen WordPress installation, you'll find various tools and options. Look for the "Plugins" tab:
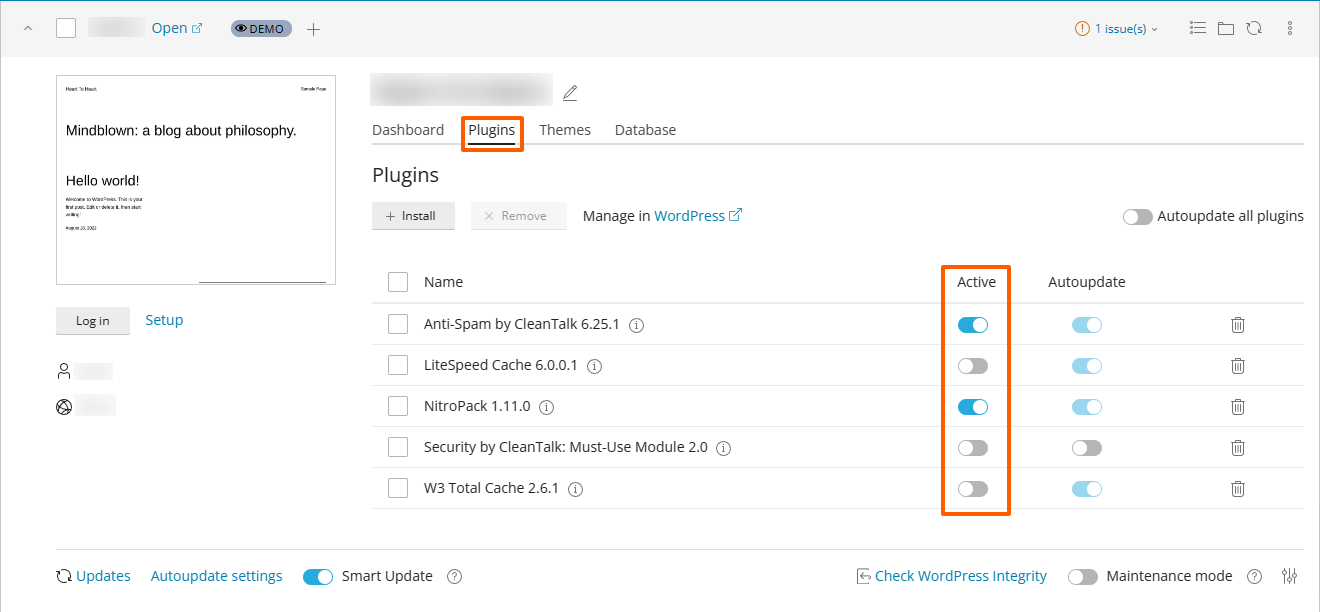
Step 5: Disable or Enable Plugins
Under the "Plugins" section, you can use the toggle buttons to disable and enable plugins.
Please be aware that certain plugins are crucial for your website, so disabling them may cause the website to no longer display correctly, certain functions or the entire website to stop working.
Updated by SP on 26/01/2024


