LiteSpeed Cache (LSCache) has plenty of advanced features that can enhance the speed of your site and make your pages load instantly. This can help your site handle a lot more traffic and reduce the resource usage of your account/server, preventing complicated and costly hosting plan or server upgrades.
This guide will show you how you can install and setup LSCache on WordPress, but please note that LSCache also has plugins for Joomla, Magento, PrestaShop and many other popular web apps (see here).
Note: Our hosting infrastructure runs Apache as the primary web server. Since the LiteSpeed Cache plugin (LSCache) delivers its best performance under LiteSpeed or OpenLiteSpeed environments, its benefits may be limited on Apache setups compared to other caching solutions. For improved compatibility and better overall results on Apache servers, we recommend using W3 Total Cache configured with Memcached. You can find setup instructions here: How to improve WordPress site performance with W3TC.
Install the LiteSpeed Cache Plugin
Before we can begin, we'll need to install the LiteSpeed Cache (LSCache) plugin, as follows:
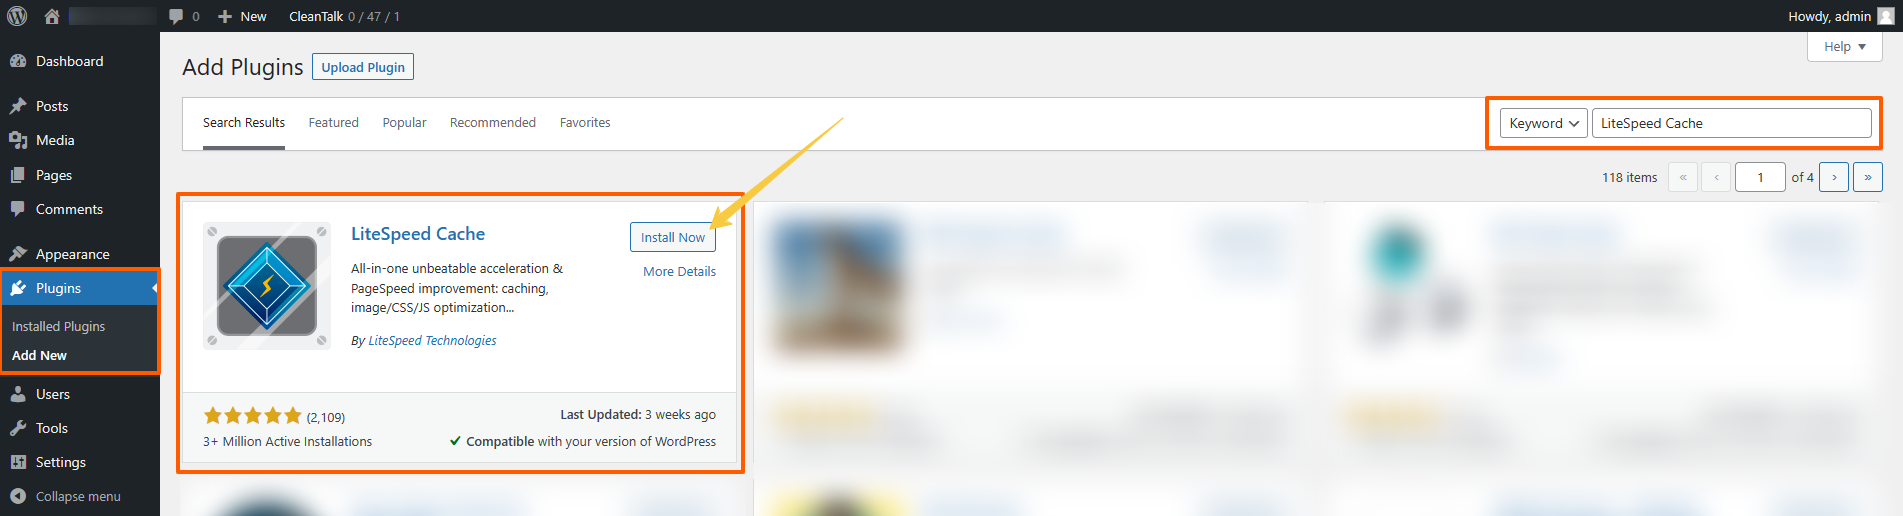
- Login to your WP Admin Dashboard (e.g.
https://example.com/wp-adminorhttps://example.com/wp-login.php- replace with your actual domain). - In the left sidebar, navigate to Plugins -> Add New, then enter "LiteSpeed Cache" in the search bar and click on the Install Now button:
- Stay on the same page and click on the Activate button to enable the plugin.
Optional: Link to QUIC.cloud
When you access LiteSpeed Cache for the first time, you will be prompted to link your site/domain to QUIC.cloud which unlocks some additional features, such as access to the Content Delivery Network (CDN) and other services (i.e. image optimisation, page optimisation, security features, and more).
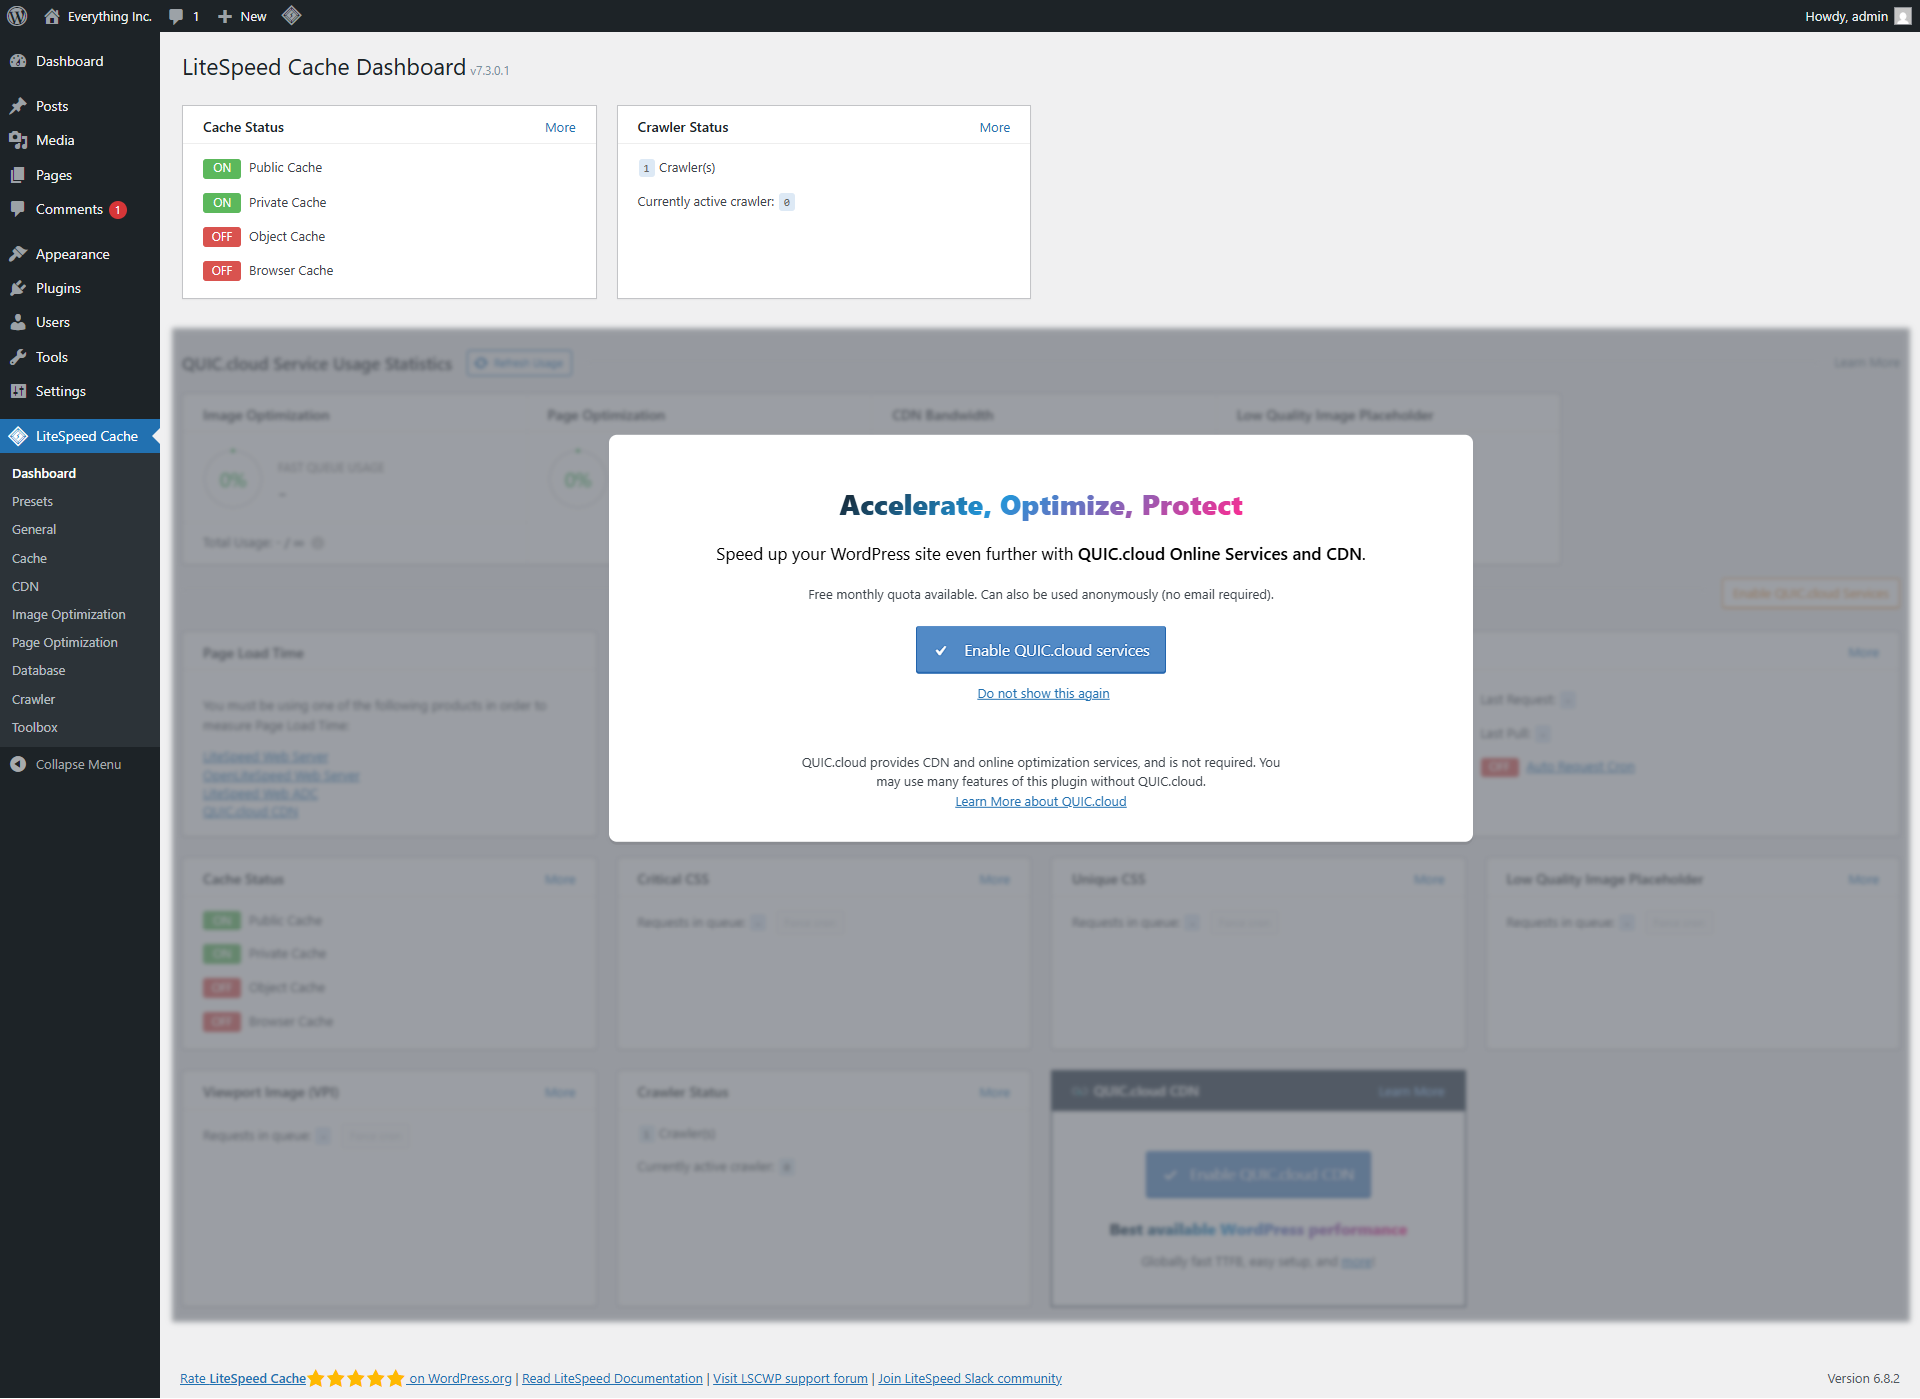
If you want to link your site/domain with QUIC.cloud, please click on the "Enable QUIC.cloud services" and follow the next steps. Otherwise, you can skip this by clicking on the "Do not show this again" button (you can find the "Enable QUIC.cloud CDN" button on the Dashboard page for later use if necessary).
Apply a LiteSpeed Cache Configuration Preset
Next we will apply a pre-defined configuration preset. This makes the initial configuration much easier. Instead of going through all LSCache settings and applying them manually, you simply apply all necessary settings in one click.
- In the left sidebar, navigate to LiteSpeed Cache -> Presets:
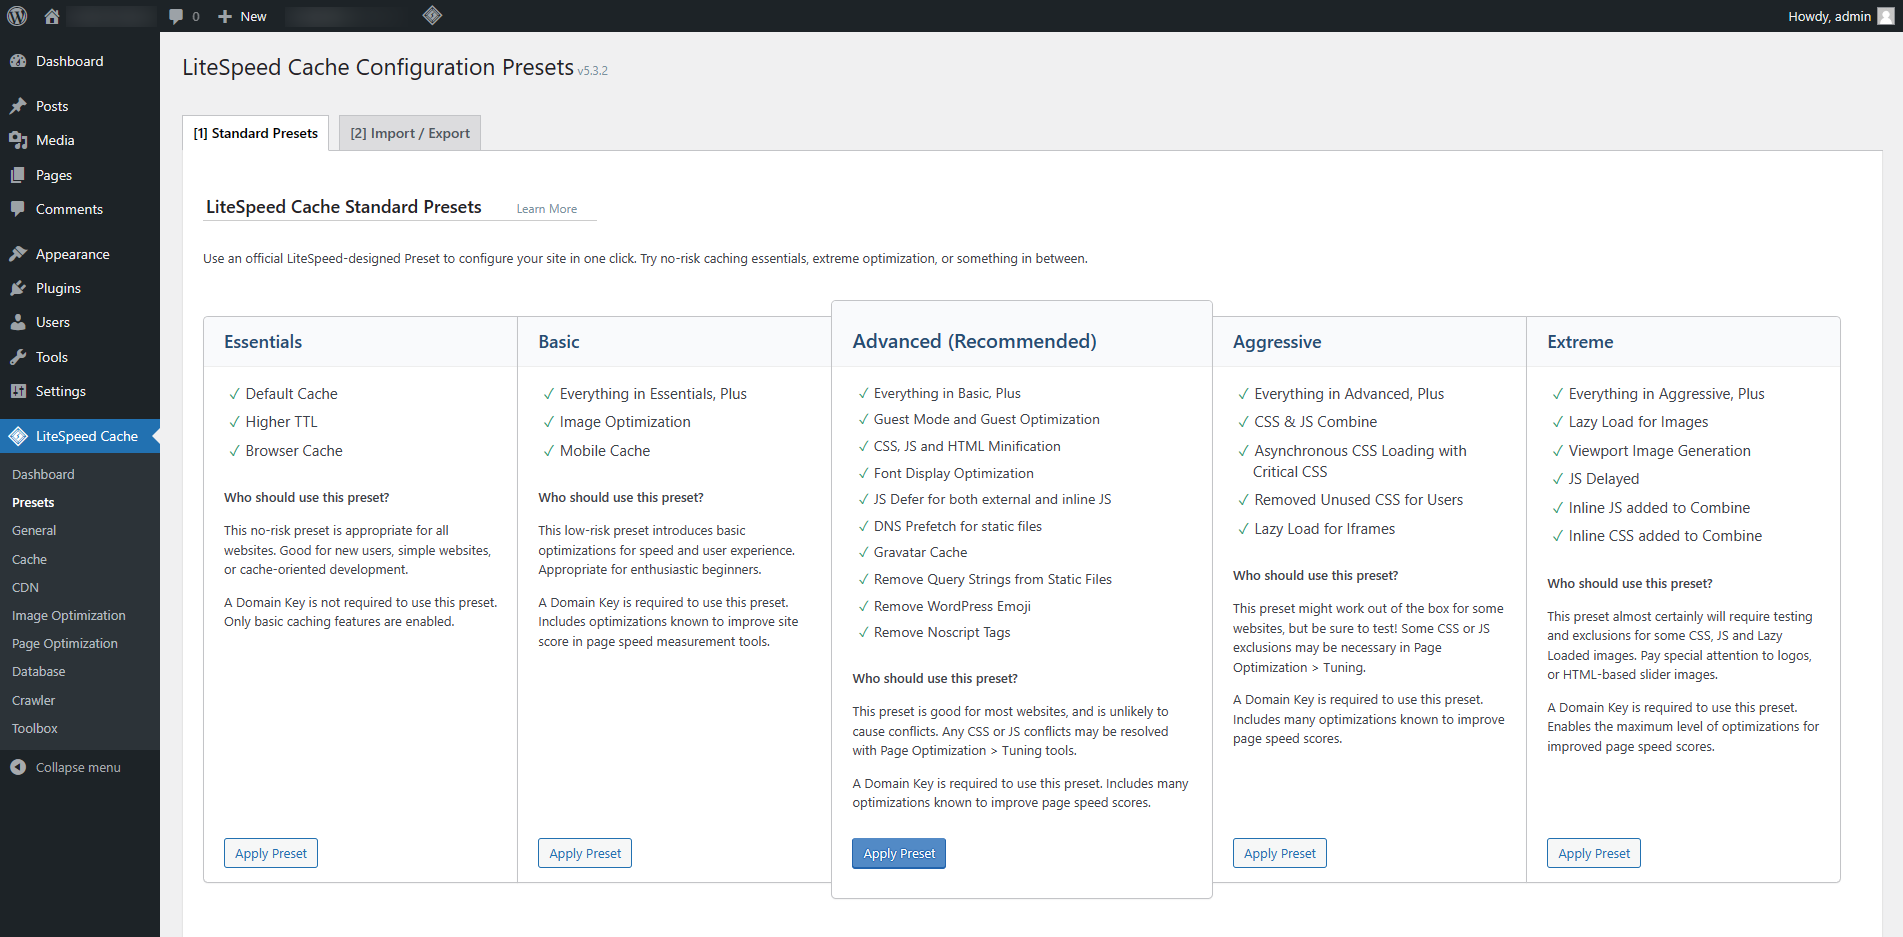
- Determine the configuration preset that matches your site best.
- Click on the Apply Preset button and confirm.
You can find out for which type of website the preset is useful for under "Who should use this preset?" of each preset. The Advanced is recommended for most websites, but please note that it requires a Domain Key first. This can be retrieved under LiteSpeed Cache -> General.
For more detailed information about configuration presets, please check the documentation: Presets | LSCache for WordPress | LiteSpeed Documentation (litespeedtech.com)
You can switch to different profiles and test which settings work best and deliver the best performance results. However, please note that the higher profile you select, the more probable it is that some functions on your site can become non-functional. There are certain LSCache features that require some manual adjustments and may not be fully compatible with your site. Please always test your site after every change in the LSCache configuration. It's recommended to export your current settings in LiteSpeed Cache -> Presets under the Import / Export tab so you can revert any faulty changes if necessary.
Optimise the WordPress Database
LSCache can help you optimise the database by cleaning up the database tables, which on some older sites can have a significant performance benefit. Most frequently the larger the database becomes, the slower the pages will load, especially within the WP Admin Dashboard.
Before running the database optimisations, please assure to define the number and age of revisions (of pages, posts, etc.). You can do this in LiteSpeed Cache -> Database under the DB Optimization Settings tab: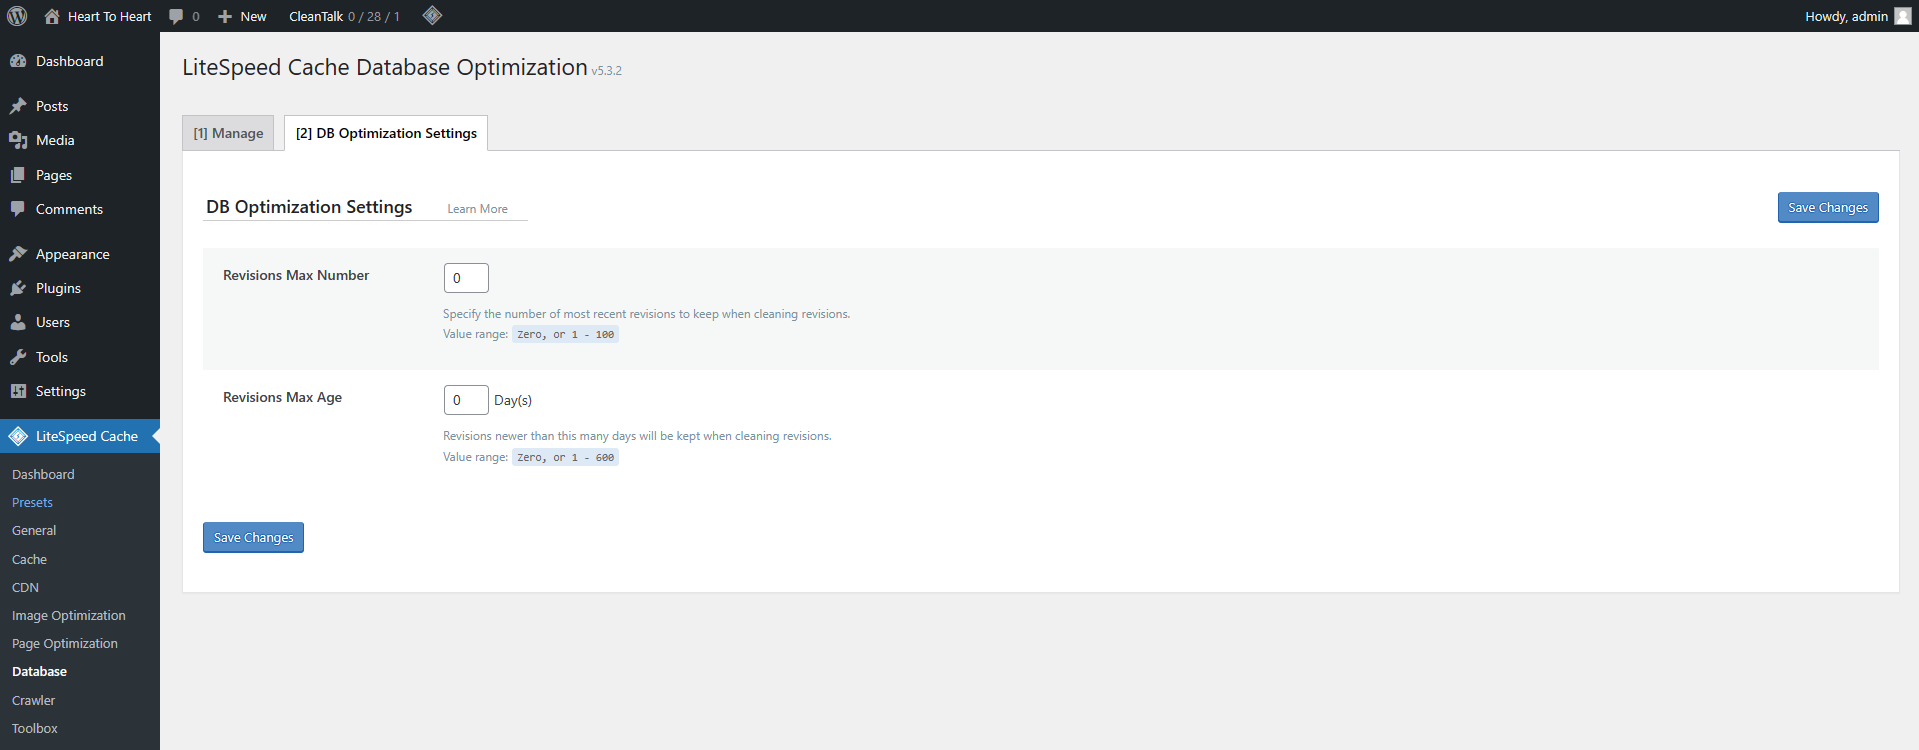
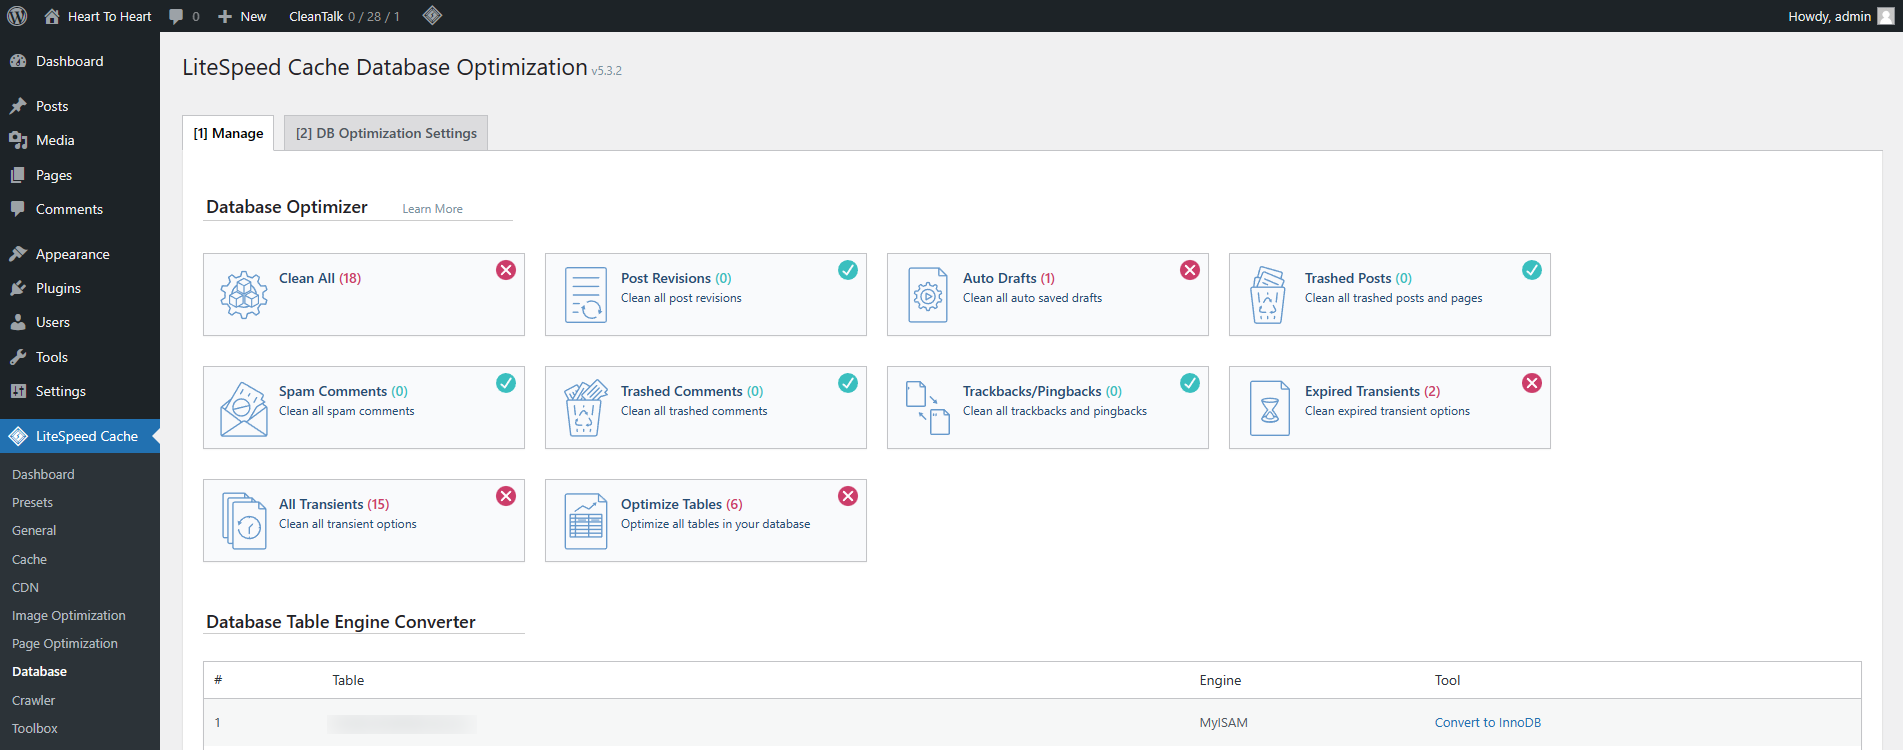
Then you can proceed running some or all of the optimisations under LiteSpeed Cache -> Database under the Manage tab:
Important: Please be aware that all data that LSCache cleans up from the database is cleaned up permanently. The only way to recover the data is by restoring the WordPress MySQL database. Before cleaning up anything, please assure that you have one or more recent database backups available.
More information about the database clean-up features can be found here: Database | LSCache for WordPress | LiteSpeed Documentation (litespeedtech.com)
Test Performance Results
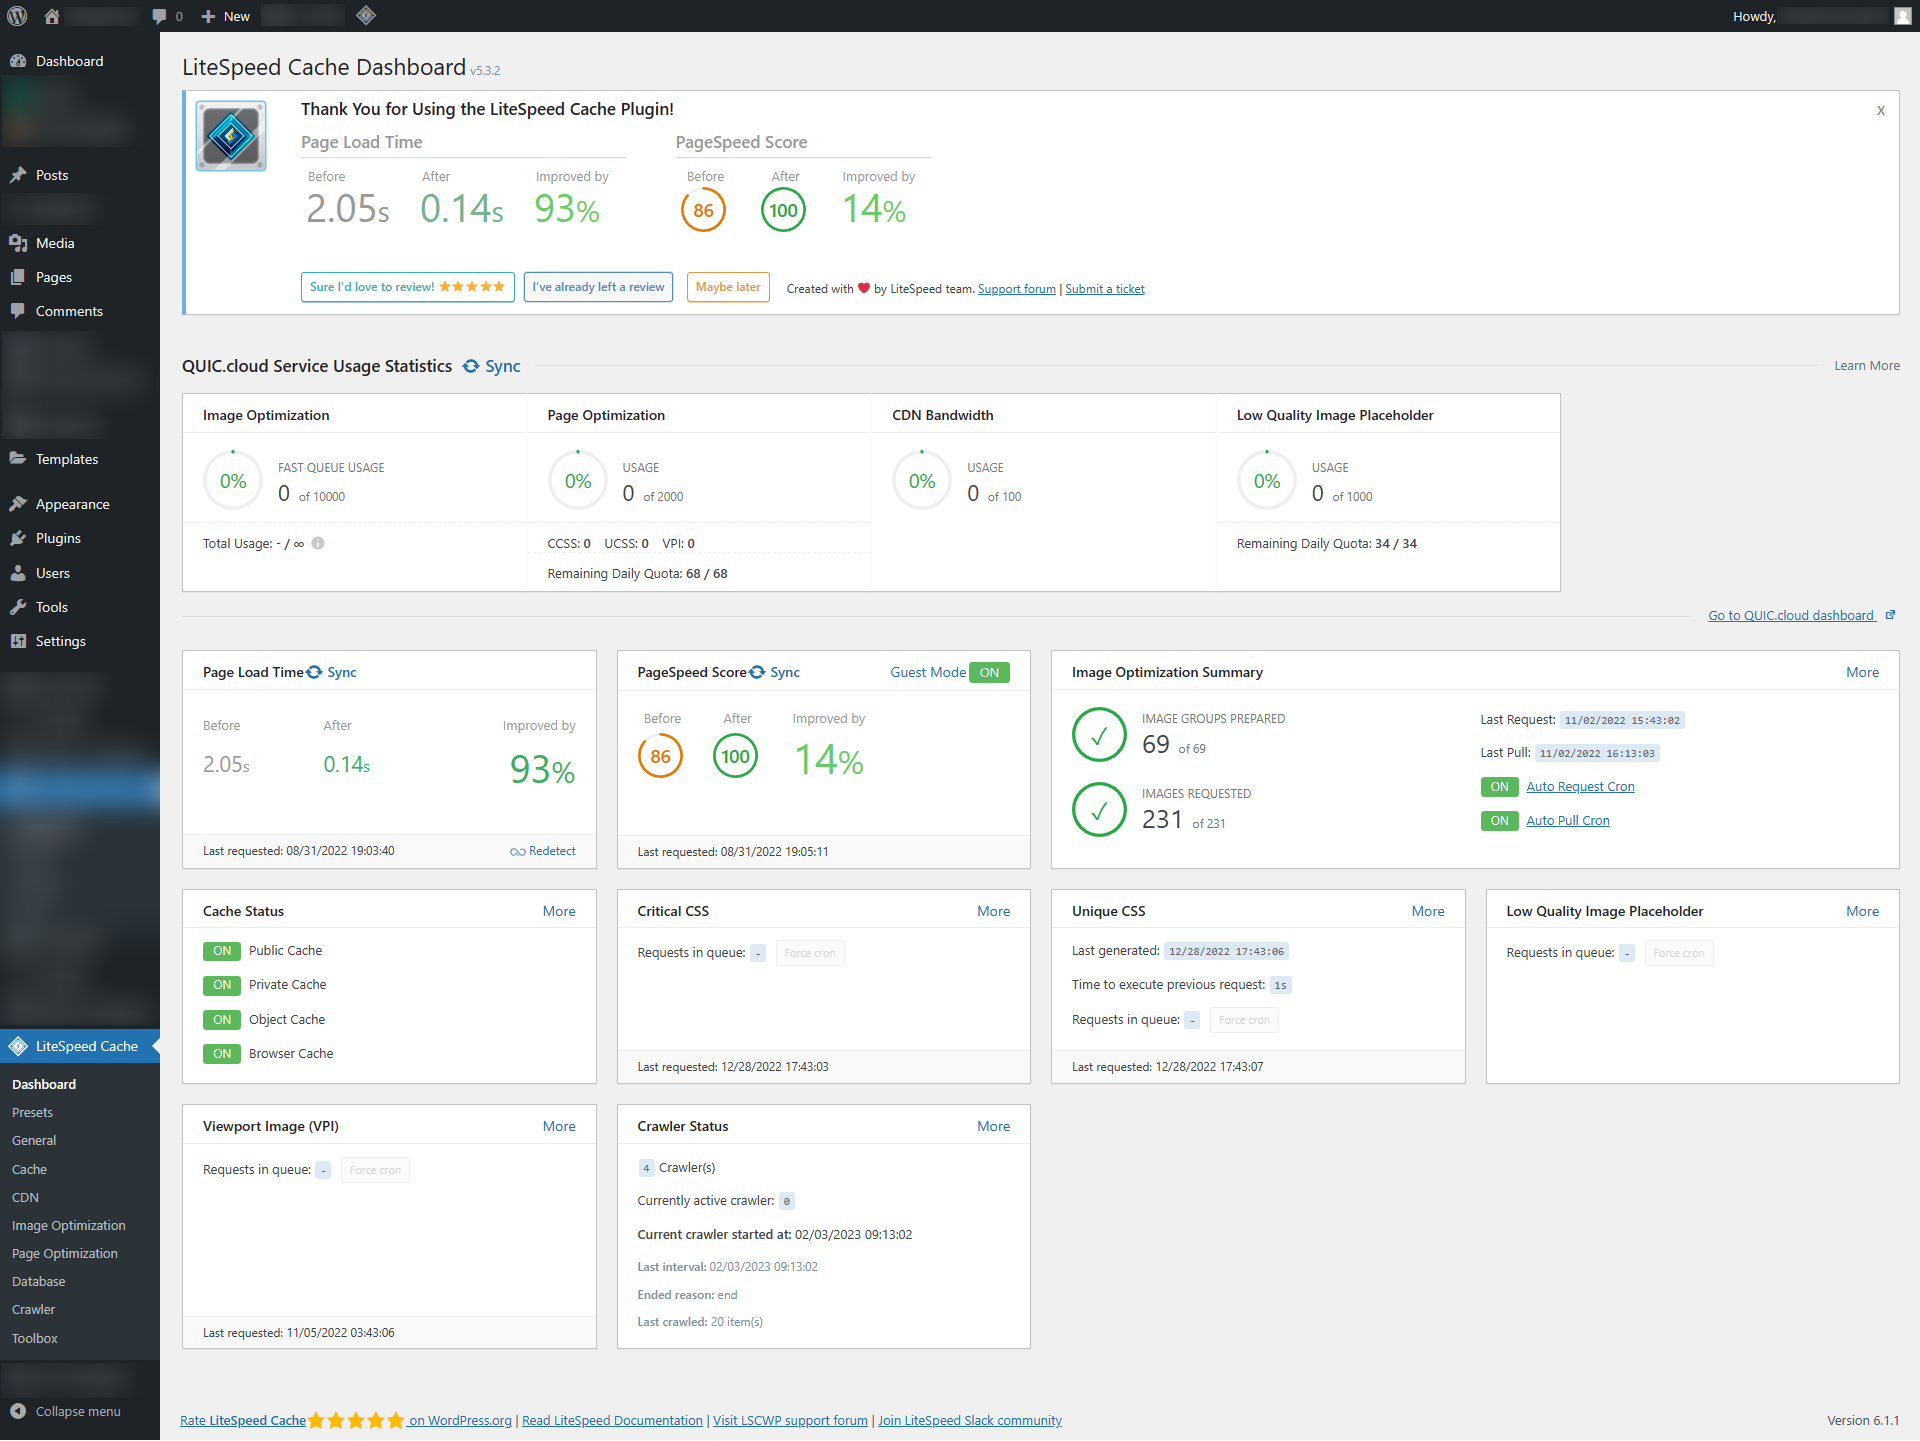
You can test the before and after results under LiteSpeed Cache -> General by clicking on the Sync buttons next to the Page Load Time and PageSpeed Score boxes:
You can also perform external performance tests using tools, such as:
- GTmetrix | Website Performance Testing and Monitoring
- Website Speed Test | Pingdom Tools
- PageSpeed Insights (web.dev)
The results will be different for every website, depending on various factors, such as the size of the site, the number and type of installed plugins, the theme and other factors.
Learn More about LSCache
There are plenty of features that LSCache has, which we cannot cover in one article. We recommend exploring the official documentation to learn more about how LSCache works and how it can benefit your website: LSCache for WordPress | LiteSpeed Documentation (litespeedtech.com)
Updated by SP on 11/08/2025


