If you're running a website on a cPanel server, you may want to consider using MemCached to improve the performance of your website. MemCached is a distributed caching system that can help reduce the load on your server and speed up your website. In this article, we will discuss how to enable the MemCached PHP extension in cPanel using the CloudLinux PHP Selector.
As of October 2023, we've installed the MemCached server and enabled the MemCached PHP extensions by default for all PHP versions across all shared/reseller servers. Cloud, VPS and dedicated servers can have MemCached installed and configured on request, please open a ticket at our technical support department for this.
Step 1: Verify if the MemCached PHP extension is already enabled
By default, all hosting accounts use the native PHP version provided by cPanel (also known as "ea-php"). This version should already have the MemCached PHP extensions installed.
To verify if the MemCached PHP extension is enabled, create a new PHP file called check-memcached-extensions.php in your website's root directory (e.g. the "public_html" folder) with the following contents:
<?php
if (extension_loaded('memcached') && extension_loaded('memcache')) {
echo "MemCached and MemCache extensions are installed.";
}
else {
echo "MemCached and/or MemCache extension NOT found.";
}
?>
Then, open your website in your web browser and go to the URL https://example.com/check-memcached-extensions.php (replacing example.com with your own domain name). You should see a message that confirms wether the MemCached and MemCache extensions are enabled. Should they already be enabled, you can skip the next steps and proceed to step 4 ("Test MemCached"), but you can also continue with the following steps if you'd like to enable other PHP extensions or change the PHP options.
Step 2: Enable alternative PHP version
To adjust your account's PHP environment and enable a custom set of PHP extensions, you will need to enable an alternative PHP version for your account (also known as "alt-php"). To do this, please follow these steps:
- Log in to cPanel (see here how: Accessing your hosting control panel (cPanel))
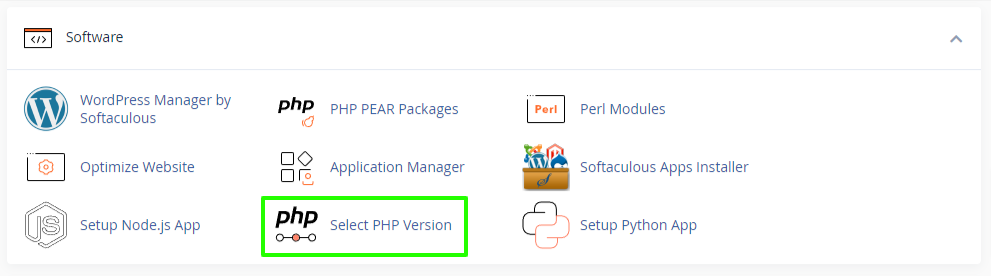
- Navigate to the "Select PHP Version" icon under the "Software" section:
- On this page, you will see a drop-down menu with a list of available PHP versions:

- Select an alternative PHP version, other than "native". The newer, the better, but please ensure first that the selected version is fully compatible with your website / scripts.

- Click on the "Apply" button. The selected PHP version will apply to your website / account with immediate effect.
- Check if your site still opens properly and enable any PHP extensions that it may require (as in the next step). If for any reason your site doesn't work correctly with the selected PHP version, please select a lower version or revert to the "native" version.
Step 3: Enable the MemCached PHP extensions
Once you have selected an alternative PHP version, you can enable the MemCached PHP extensions. Here are the steps:
- Navigate to the "Select PHP Version" icon under the "Software" section.
- Click on the "Extensions" tab.
- In the "PHP Extension" section, tick the boxes next to "memcache" and "memcached":
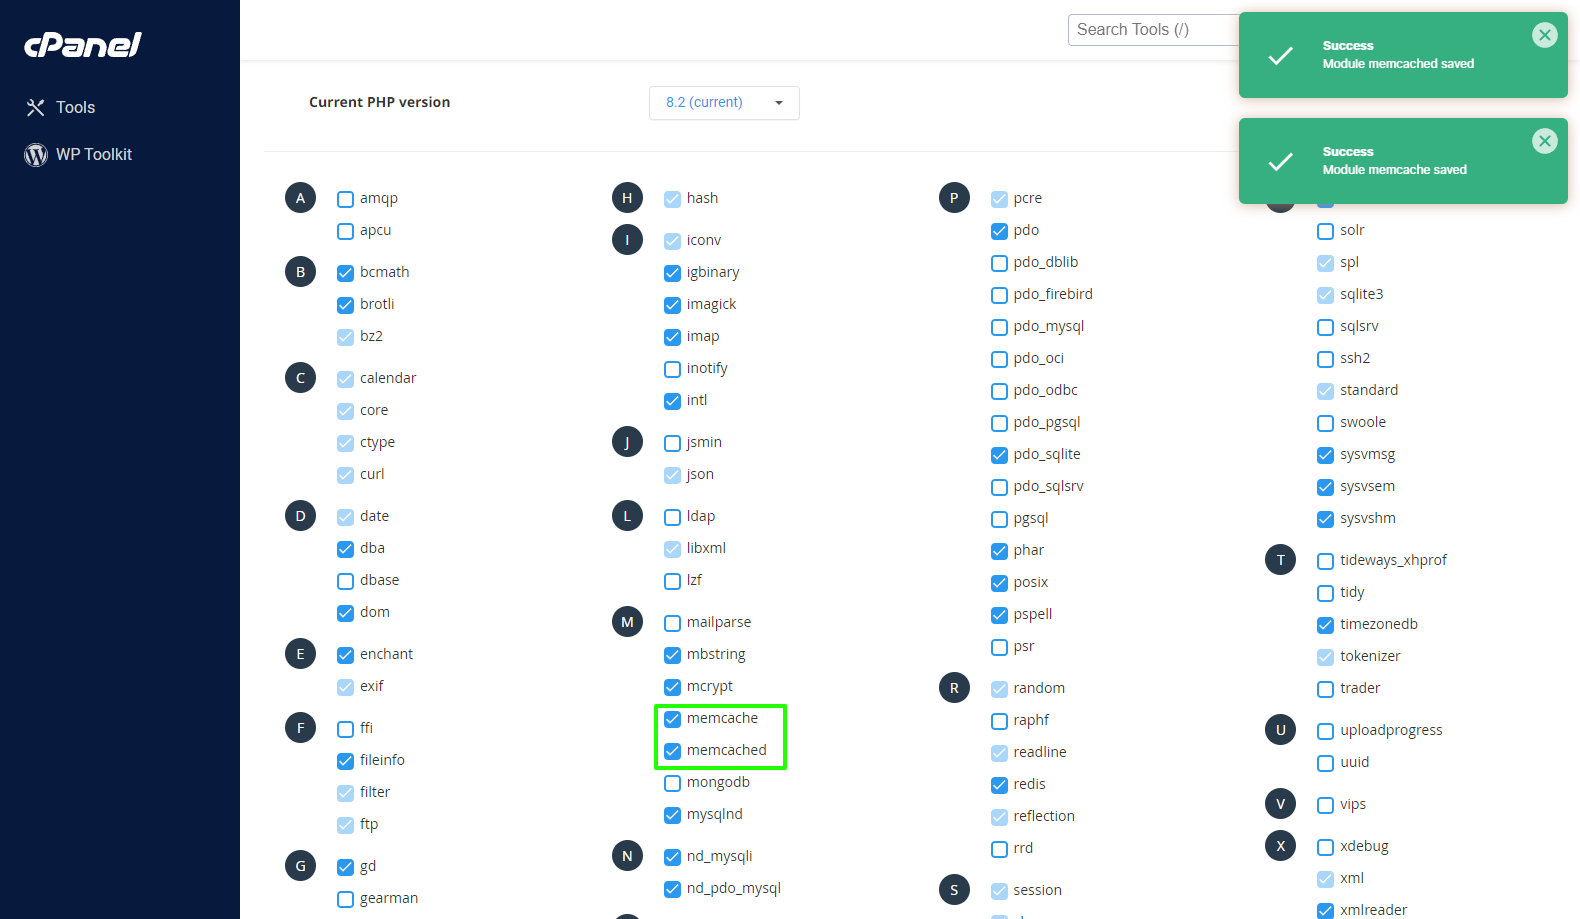
- The PHP extensions will be enabled with immediate effect. You should see a message box confirming your selection.
Step 4: Test MemCached
Finally, you can test if MemCached is working properly by creating a test script that uses MemCached. Here's an example script that stores and retrieves a value from MemCached:
<?php
// Connect to MemCached
$memcached = new MemCached();
$memcached->addServer('localhost', 11211);

// Store a value
$memcached->set('testkey', 'testvalue', 60);

// Retrieve the value
$value = $memcached->get('testkey');

// Output the result
if ($value === "testvalue") {
echo "MemCached appears to work correctly.";
} else {
echo "MemCached does not seem to work.";
echo "Please ensure that the 'memcached' and 'memcache' extensions are enabled and the MemCached server is installed and running.";
}
?>
Save this script as memcached-test.php in your website's root directory (e.g. the "public_html" folder) and open it in your browser. The URL would be https://example.com/memcached-test.php (replacing example.com with your own domain name).
You should see a confirmation whether MemCached works or not. If the page returns an error or a blank page, then the MemCached may not be installed on your server yet or something doesn't work correctly. Please contact our technical support department in this case.
If you get a successful message that MemCached works correctly, you can start using it with your site and caching systems.
Final Step - Cleaning up the test scripts
It's always a good idea not to leave test scripts behind, as they are publicly accessible and could be exploited, so please remove both scripts that we've used in this article for testing (memcached-test.php and check-memcached-extensions.php).
Conclusion
Enabling the MemCached PHP extension in cPanel using the CloudLinux PHP Selector is a simple process that can help improve the performance of your website. By following the steps outlined in this article, you should be able to enable MemCached and start seeing the benefits of this powerful caching system.
DISCLAIMER: The scripts provided in our knowledgebase are for informational purposes only. We do not provide any warranty or support. It is essential to review and modify the scripts to fit your site's specific needs. There may be unforeseen outcomes when adding new script code to an existing website. You should discuss it with your website manager and seek advice from an experienced website developer if you are unsure.
Updated by SP on 17/10/2023


