This guide is intended for customers who want a quick and reliable way to speed up their WordPress site on shared hosting. The easiest method is to use a caching plugin such as W3 Total Cache together with Memcached, which stores frequently used data so your site loads faster and uses fewer server resources. In this article, we’ll walk you through the setup step by step, even if you’re new to caching or WordPress optimisation.
W3 Total Cache (W3TC) is a popular plugin for WordPress that is used to optimise the performance of websites. It provides a range of features that can help to improve the load times of your website, including caching, minification, and content delivery network (CDN) integration.
Step 1: Prerequisite Check for MemCached
Before we can get started, you'll need to assure that the MemCached server and the PHP extensions are available on the server and enabled for your account. This step is outlined in a separate article: How to enable the MemCached PHP extensions using the CloudLinux PHP Selector
Step 2: Install W3 Total Cache
To install W3 Total Cache:
- Login to your WP Admin Dashboard (e.g.
https://example.com/wp-adminorhttps://example.com/wp-login.php- replace with your actual domain). - In the left sidebar, navigate to Plugins -> Add New, then enter "W3 Total Cache" in the search bar and click on the Install Now button:
- Stay on the same page and click on the Activate button to enable the plugin.
Step 3: Setup Guide
Once W3 Total Cache has been installed and activated, you will need to run the initial setup guide. To do this, go to the Performance -> Setup Guide section in your WordPress dashboard. From there, you will have to go through the following steps.
Recommendation: Select MemCached or Redis as the Storage Engine whenever possible, even if other options may appear to be faster in the next steps. Memory-based caching generally outperforms disk-based caching. You can learn about the differences and benefits of memory-based caching in our separate article: Memory-Based Caching vs. Disk-Based Caching
- Choose whether you want data about how W3TC is being used to be collected and click Next on the welcome screen.
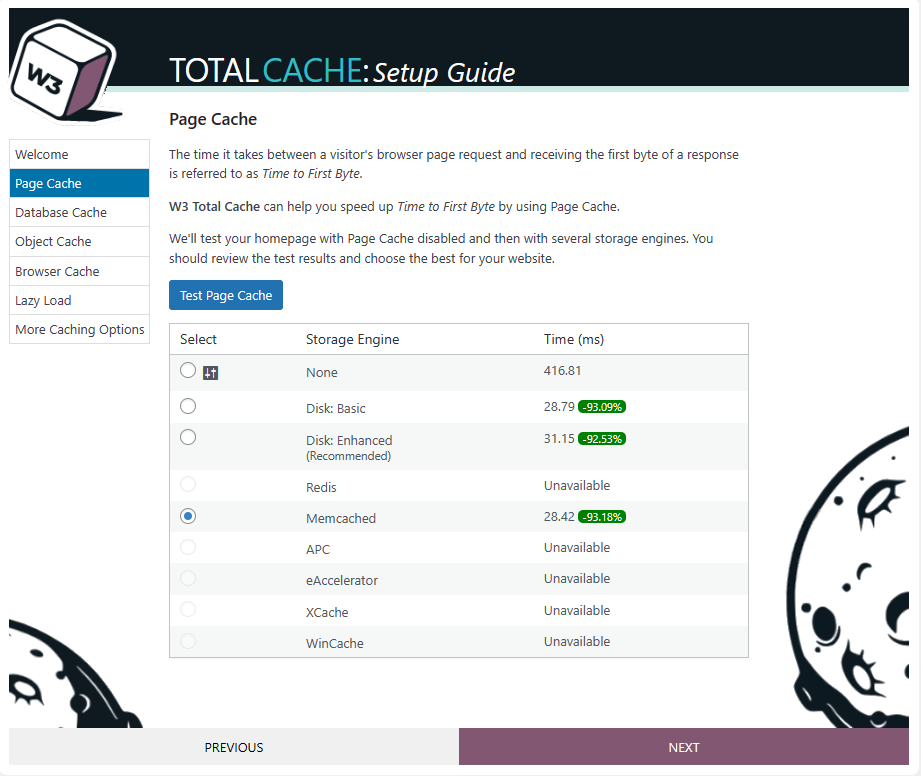
- Page Cache (select Memcached): This option allows you to enable caching for your pages. This can help to improve the load times of your pages by storing a copy of the page's content in cache:
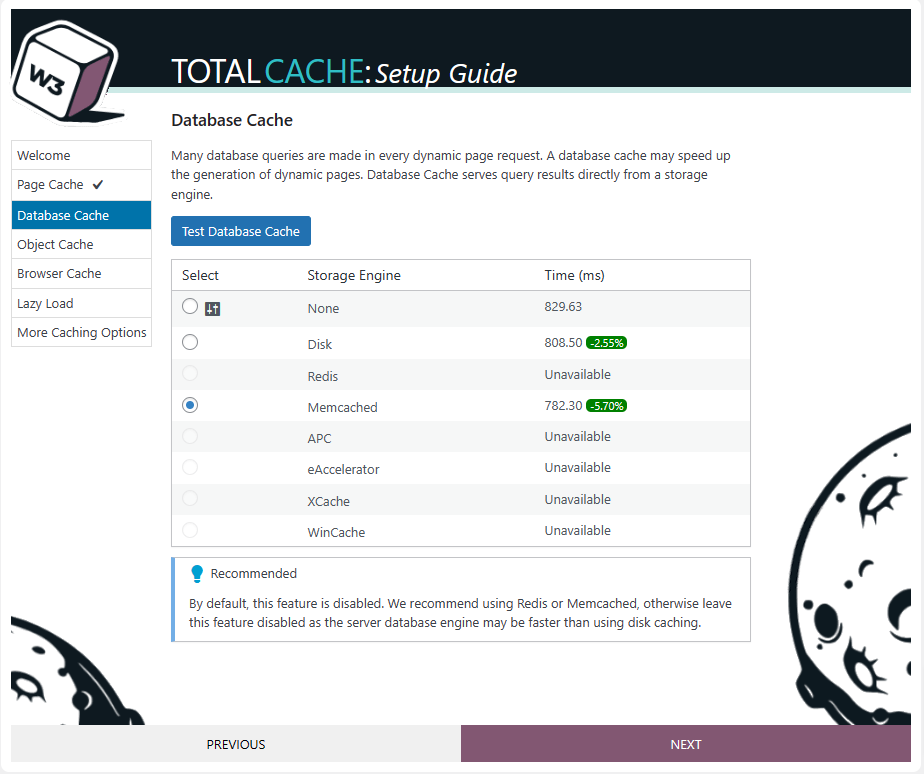
- Database Cache (select Memcached): This option allows you to enable caching for your database, which can help to reduce the load on your database and improve the performance of your site:
- Object Cache (select Memcached): Speed up dynamic pages by persistently storing objects, reducing the number of database queries:

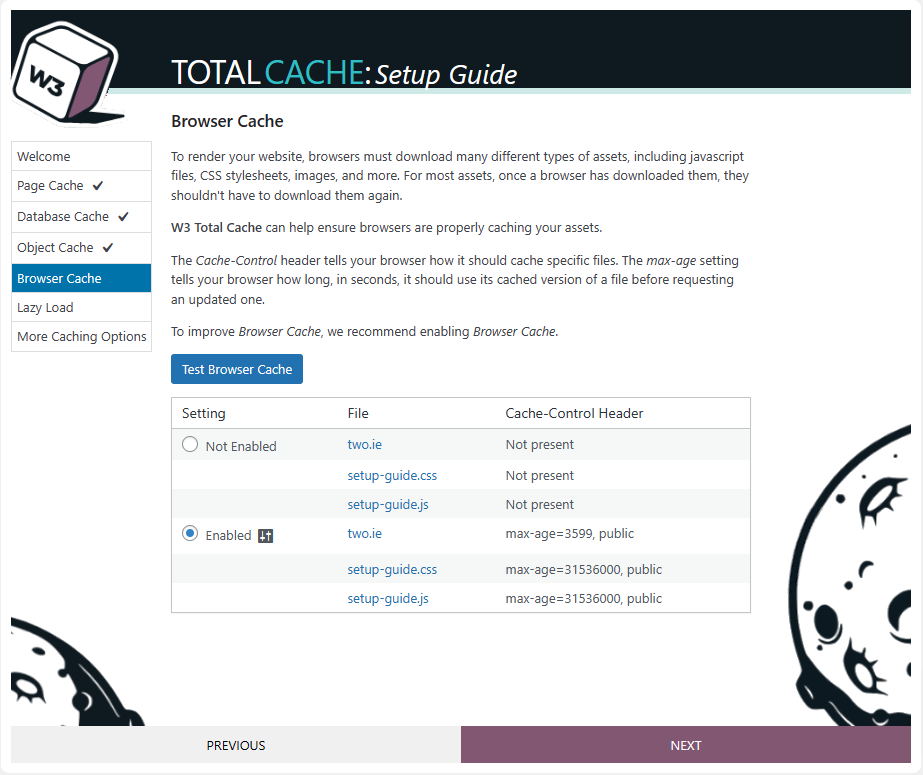
- Browser Cache (select Enabled): Ensure that browsers cache static objects optimally, reducing the number of HTTP requests and loading them faster:
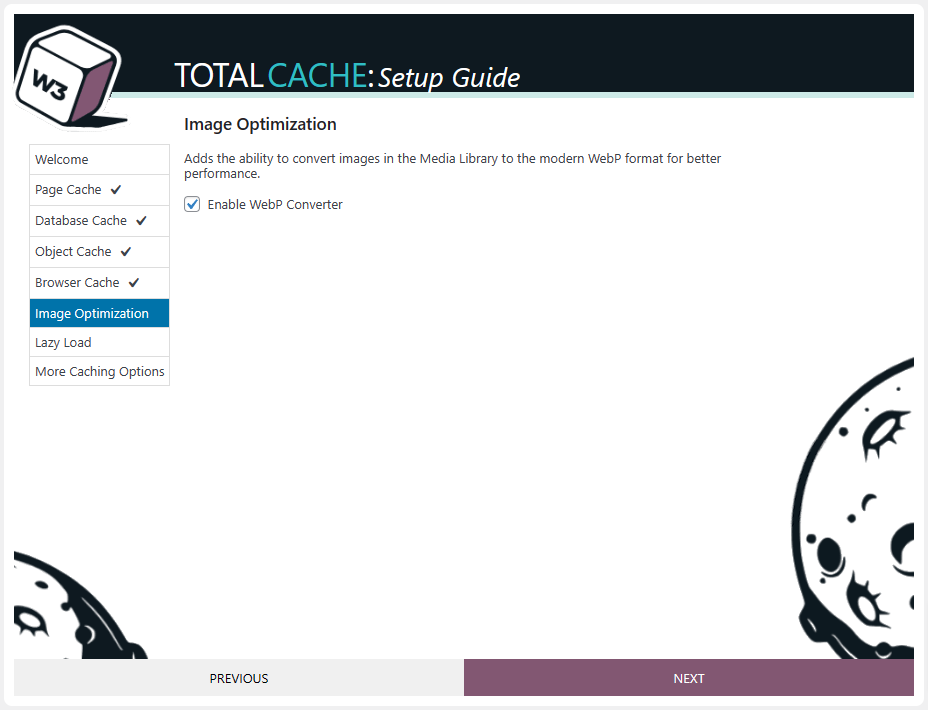
- Image Optimization (enable): Adds the ability to convert images in the Media Library to the modern WebP format for better performance:
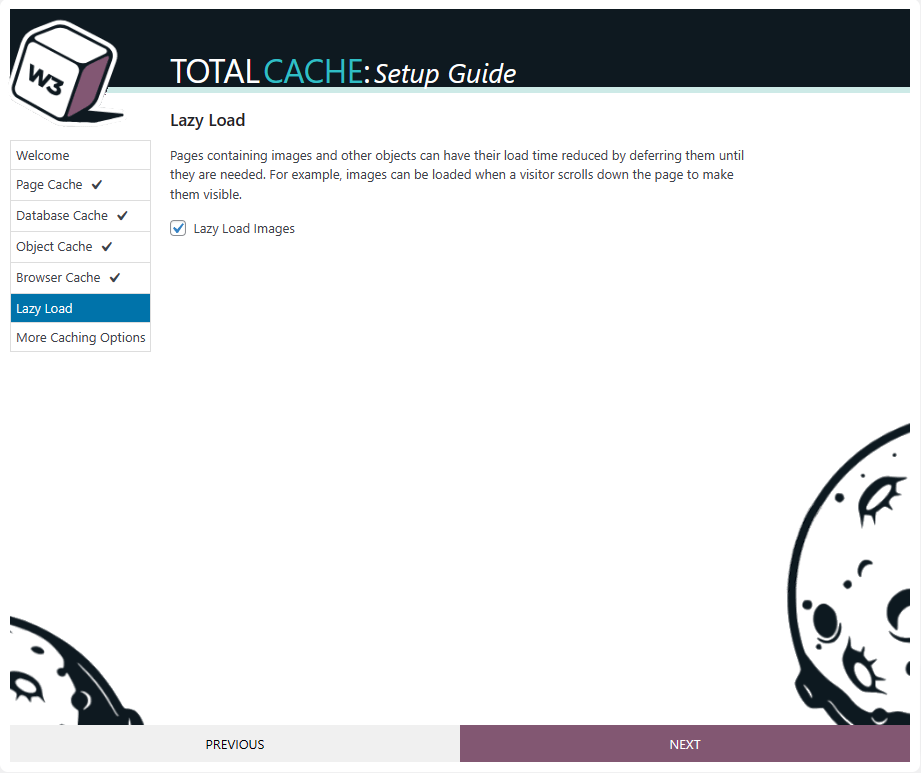
- Lazy Load (enable): Many images and static elements that aren't initially in the visible viewport shouldn't be loaded immediately, but only once the visitor scrolls to them. This is called "lazy loading" and can cut the page loading time and reduce bandwidth usage:
- The setup is complete. You can review the settings and go back to previous steps if you need to make any changes:
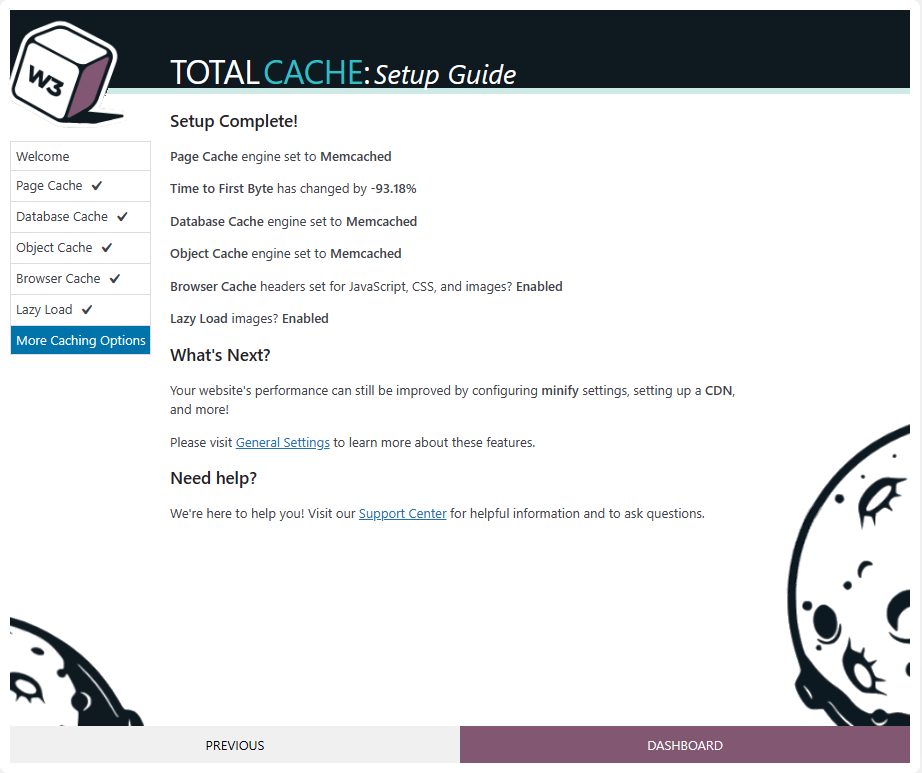
Your site's performance can be improved even more by configuring minify settings, setting up a CDN, and other features that W3 Total Cache provides! Please navigate to Performance -> General Settings to further adjust the settings.
On the General Settings page we recommend also enabling the Opcode Cache option:

Note: If the Opcode option is disabled and you can't select any option from the drop-down menu, then the opcache PHP extension is not enabled for your account's PHP environment. You can enable it in cPanel -> Software -> Select PHP Version under the Extensions tab.
Additionally, you can enable the Minify option that allows W3TC to minify your HTML, CSS, and JavaScript files. This can help to reduce the size of your pages and improve load times. However, please be careful that this feature can sometimes break some site functions, as noted in the pop-up message that appears when ticking the Enable checkbox. Definitely test your site after enabling this feature, and disable it in case something doesn't work properly.
Step 4: Configure CDN
W3 Total Cache also allows you to integrate with a content delivery network (CDN). A CDN can help to improve the performance of your site by caching your content on servers located around the world, so that it can be served more quickly to visitors. To configure a CDN, go to the "Content Delivery Network" section in the "Performance" section of your WordPress dashboard. From there, you can enter the settings of your CDN provider.
Step 5: Test Your Site
Once you have configured W3 Total Cache, it is important to test your site to ensure that everything is working correctly. You can use tools such as GTmetrix or Pingdom to test the load times of your pages and identify any areas for improvement. If you encounter any problems, you can refer to the W3 Total Cache documentation for further assistance.
- GTmetrix | Website Performance Testing and Monitoring
- Website Speed Test | Pingdom Tools
- PageSpeed Insights (web.dev)
The results will be different for every website, depending on various factors, such as the size of the site, the number and type of installed plugins, the theme and other factors.
In conclusion, W3 Total Cache is a powerful plugin for optimising the performance of WordPress sites. By following the steps outlined in this article, you can install and configure W3 Total Cache to improve the load times of your site, reduce the load on your server, and integrate with a CDN.
Updated by SP on 11/01/2024


