Clone a WordPress Site
Sometimes you may want to clone your WordPress website if:
- you want to start a similar site,
- make changes to a "development" or "staging" site before applying the changes to your "production" site, or
- move your site to a different sub-domain.
Just to name a few examples. With cPanel's WordPress Management (formerly WP Toolkit), cloning an existing site is very easy and can be done in a matter of minutes.
Go to WordPress Management
Login to your cPanel account and under the "Domains" category, you will find "WordPress Management":

Backup
It's always a good idea to have a current external backup before doing anything, as you never know what can go wrong due to technical issues or human error.
You can generate a backup of your WordPress site by clicking on the "Back Up / Restore" button and then on the "Back Up" button. Once the backup is finished, you can download it by clicking on the "Download" button on the right side of the backup file.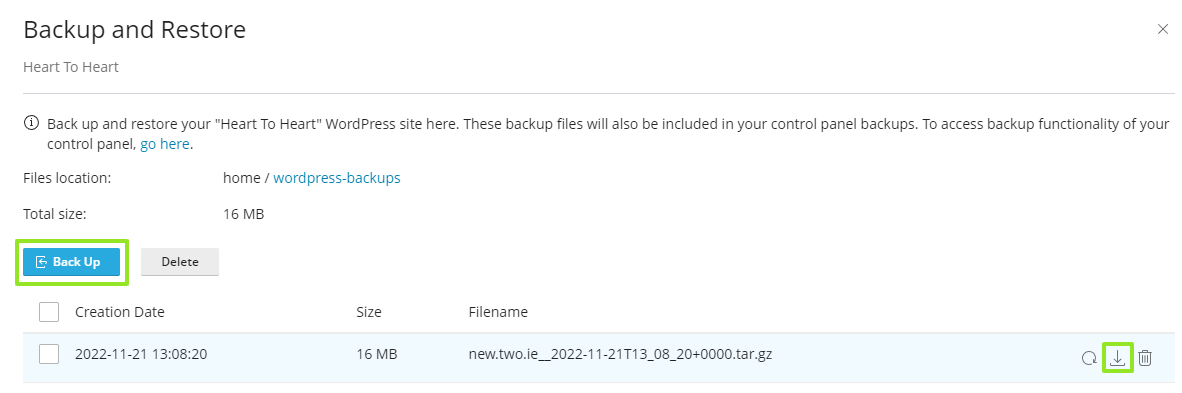
Alternatively, or additionally, you can generate and download a full account backup under cPanel -> Files -> Backup -> Download a Full Account Backup.
Clone the WordPress site
Now we can proceed with cloning the WordPress site.
- Click on the "Clone" button on the card of the WordPress installation that you want to clone.

- Choose whether you want to create a new sub-domain or use an existing sub-domain. (NOTE: Make sure that the sub-domain isn't used by an existing site already).
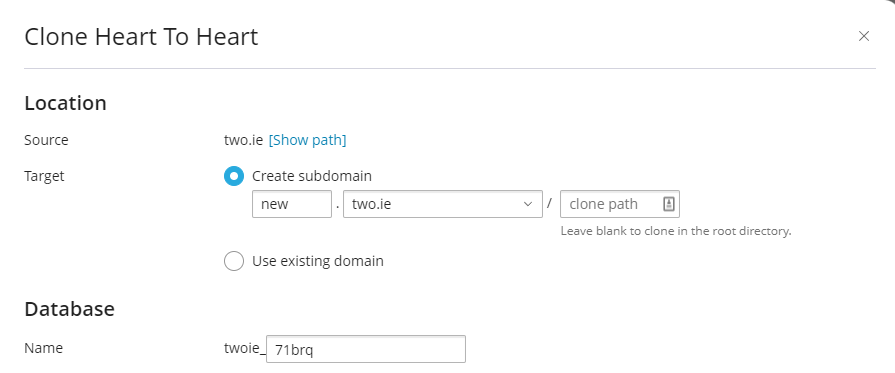
- Optionally, edit the name of the new database.
- Click on the "Start" button to start the cloning process.
Final Steps
Once the cloning process is finished, you will see your new cloned site listed under the WordPress installations.
There are a few things to take note of and recommended steps after cloning a site:
- By default, all cloned sites will have search engine indexing disabled to prevent SEO penalties due to duplicate content.
When you've finished editing your site and it's ready to be indexed by search engines, you can enable search engine indexing through the WordPress admin panel or using WordPress Management in cPanel. - New sub-domains have self-signed SSL certificates at first. It can take up to 24 hours for AutoSSL to issue a signed SSL certificate.
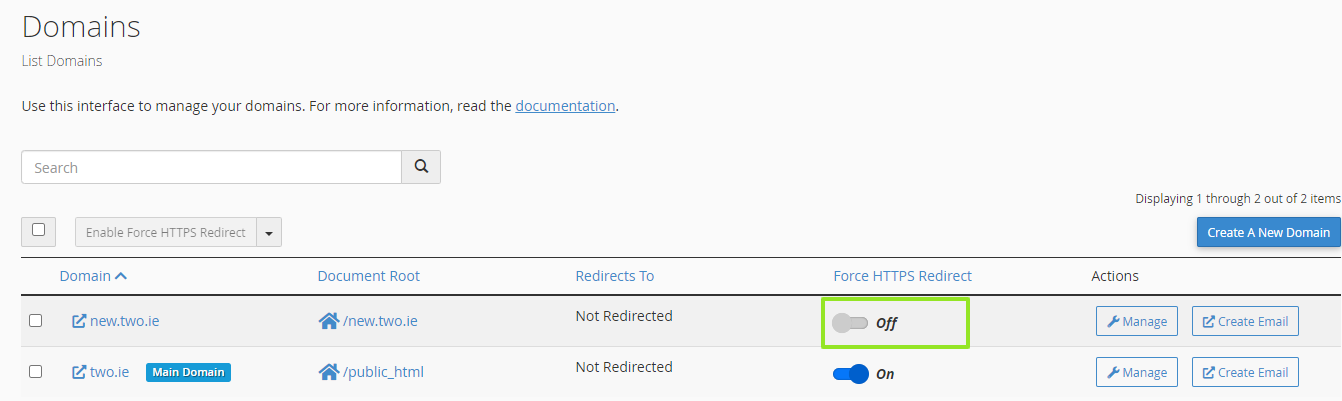
- Once a signed SSL certificate has been issued and installed, you should enable "Force HTTPS Redirect" in cPanel under "Domains".
- Apply all security measures suggested by WordPress Management under the "Dashboard" tab -> "Security"
Copy Data from Staging Site to Production Site
If the scope of cloning the site was to create a "development" or "staging" environment, we'll show you next how to copy the modifications that you've done from the "staging" site over to your "production" site.
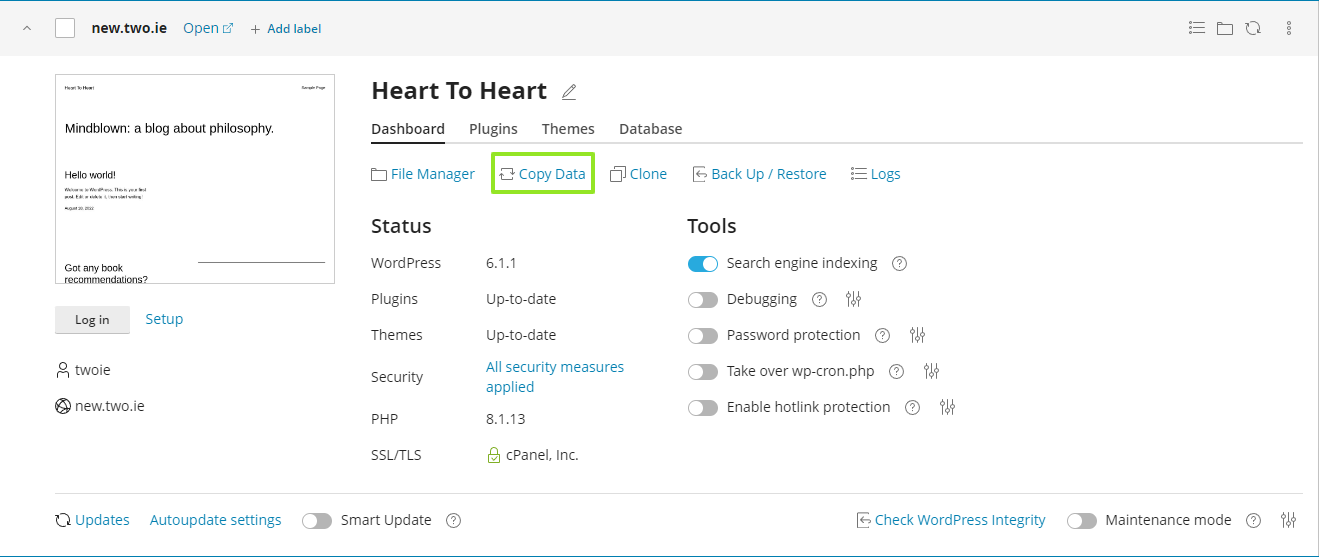
Click on the "Copy Data" button under the "staging" site
This would be the "development" site where you've done the changes that should be replicated to the "production" site.
Select the Data
On the next step, you will be prompted to select the WordPress site to which you'd like to copy the data (the "production" site) and which data you'd like to copy:
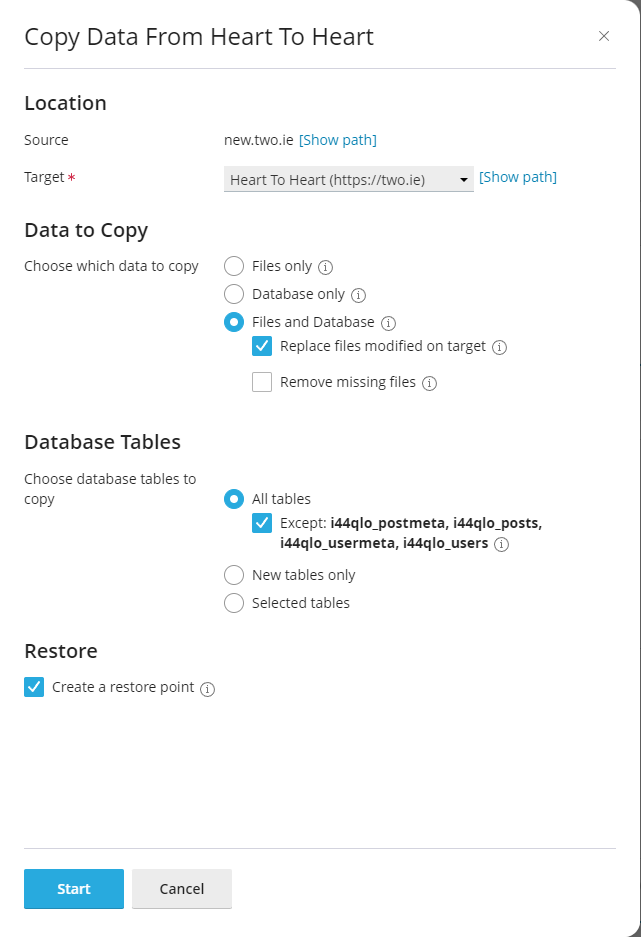
The default settings should be fine in most cases, but if you want to have the posts, users and metadata copied over, please untick the "Except" checkbox under "All tables".
Location
Select your "production" site as the target.
Data to Copy
If any themes or plugins have been updated in the meantime on any of the sites, it's strongly recommended to select "Files and Database" and tick "Replace files modified on target".
Database Tables
Select "All tables" to copy all changes to the production site.
By default, WordPress Management excludes the tables for pages, posts and users. You can untick this option, especially if you have done changes to any of these three and you would like to replicate them to the production site.
Restore
It's never a bad idea to create a restore point and keep "Create a restore point" enabled. You can use the restore point to roll back the changes if something goes wrong.
Start the Copy Process
Click on the "Start" button and wait for the process to finish.
Although the process runs in the background, it's recommended not to close or leave the page. Please wait for it to finish so you can see any errors or warnings that may occur.
Once the process finishes, you should see the data and changes from the "staging" site on the "production" site.
Updated by SP on 12/12/2024


