Most websites now use HTTPS as standard. HTTPS encrypts traffic between your website and its visitors and is essential for security, SEO and browser trust.
All Maxer hosting plans include free AutoSSL on cPanel-based servers. This means your hosting account already has a valid SSL certificate for your website in most cases, and that certificate is renewed automatically.
If your website uses Cloudflare, you should also review a few Cloudflare settings so that HTTPS works correctly between the visitor, Cloudflare and your hosting account.
If you do not yet use Cloudflare, it can help with CDN caching, DDoS mitigation, bot filtering and performance optimisation by acting as a reverse proxy in front of your website.
How to configure HTTPS when using Cloudflare
Step 1: Log in to your Cloudflare dashboard at https://dash.cloudflare.com
If you already have a Cloudflare account but cannot access it, use the "Forgot your password?" link to reset your password.
Step 2: Open the correct website and go to SSL/TLS
In the Cloudflare dashboard, select the relevant domain name, then go to SSL/TLS. Repeat the checks below for each website that is proxied through Cloudflare.
Step 3: Set the SSL/TLS encryption mode to Full (strict)
On the Overview page, Cloudflare offers the modes Off, Flexible, Full and Full (strict).
For Maxer hosting accounts running on cPanel, the recommended setting is Full (strict). Because AutoSSL provides a valid certificate on the server, Cloudflare can verify the certificate correctly and keep the connection encrypted all the way to your hosting account.
Do not use Flexible unless your origin server genuinely does not support HTTPS. Cloudflare's current documentation warns that Flexible is only partially secure and can cause redirect loops such as ERR_TOO_MANY_REDIRECTS.
Full should only be treated as a temporary fallback if the origin certificate is not yet valid. In a normal cPanel + AutoSSL setup, Full (strict) is the correct long-term setting.
Step 4: Enable Always Use HTTPS
Go to SSL/TLS -> Edge Certificates and turn on Always Use HTTPS. Cloudflare currently recommends this feature when you want all visitor traffic redirected from HTTP to HTTPS.
Best practice: use one main HTTPS redirect method. If your website is proxied by Cloudflare, it is usually best to let Cloudflare handle the HTTP to HTTPS redirect. Avoid stacking multiple redirect methods unless you know exactly why you need them.
For example, if Always Use HTTPS is enabled in Cloudflare, you usually do not also need to force HTTPS for the same hostname in cPanel, in .htaccess, or within your application. Multiple redirect layers can make troubleshooting harder and can sometimes create redirect loops.
Step 5: Set Minimum TLS Version to TLS 1.2 or higher
On the Edge Certificates page, set Minimum TLS Version to TLS 1.2 or higher. This blocks obsolete protocols such as TLS 1.0 and TLS 1.1, which are no longer safe or recommended.
Step 6: Enable Automatic HTTPS Rewrites
If your website still contains some old http:// links to images, stylesheets or scripts, Automatic HTTPS Rewrites can help reduce mixed-content warnings.
This feature is helpful, but it is not a complete substitute for updating your website. You should still change hard-coded HTTP links in your website, theme, CMS settings or database wherever possible. After making changes, test your pages carefully. The scanner at Why No Padlock? is a useful tool for checking mixed content.
Step 7: Keep cPanel service sub-domains on DNS only
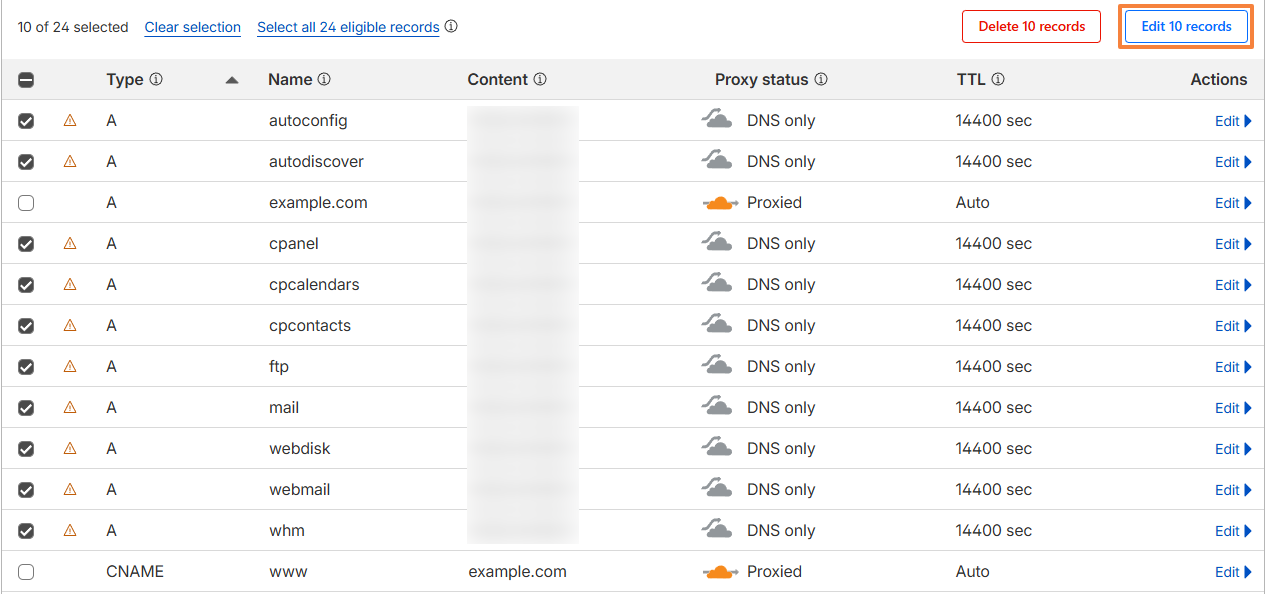
Service sub-domains related to cPanel/WHM, such as cpanel., webmail., cpcontacts., cpcalendars., autoconfig. and autodiscover., should not normally be proxied through Cloudflare. These hostnames are service endpoints, not website front-ends.
In Cloudflare DNS, keep only the actual website hostnames proxied, such as the root domain (example.com), the "www" sub-domain (www.example.com), and any real website sub-domains you intentionally want behind Cloudflare. Set service sub-domains to DNS only.
To change this, go to DNS in Cloudflare, select the service sub-domains, and click on the Edit 10 records button (the number may differ in some cases):
Set the toggle to DNS only (with the grey cloud):
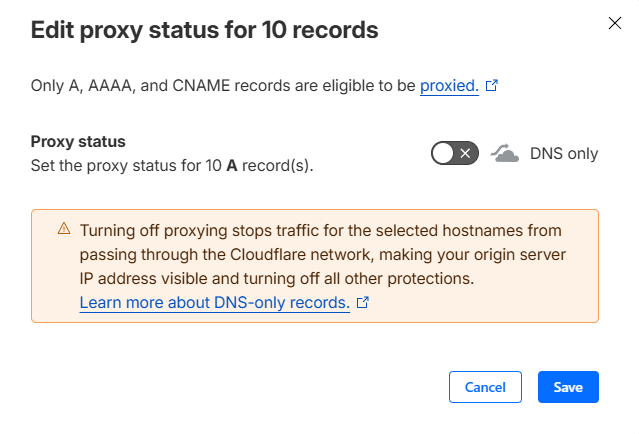
Click on the Save button to apply the changes.
Step 8: Check your website and application settings
Once the Cloudflare settings above are in place, test your website in a private browsing window using both http:// and https://. Confirm that:
- HTTP redirects to HTTPS correctly.
- The browser does not show certificate or mixed-content warnings.
- Your CMS or application uses the HTTPS site URL.
- Login pages, cart pages and forms load and can be submitted over HTTPS without redirect loops.
If your website is managed directly in cPanel and is not proxied by Cloudflare, cPanel's Domains page also includes a Force HTTPS Redirect toggle for domains with a valid SSL certificate. For websites proxied by Cloudflare, we generally recommend letting Cloudflare handle the redirect instead, but enabling this option should not cause any issues. It can be useful to enable it to address the AutoSSL warning in the WordPress Management tool.
Additional best practice: only consider enabling HSTS after you have confirmed that your website and any required sub-domains work correctly over HTTPS. HSTS is useful, but it is stricter and can make rollbacks harder if HTTPS is not fully working yet.
Related guides:
- For non-WordPress sites and HTML sites: Enabling HTTPS on your website using .htaccess
- For WordPress websites: Enabling HTTPS on a WordPress website
Updated by SP on 06/03/2026


